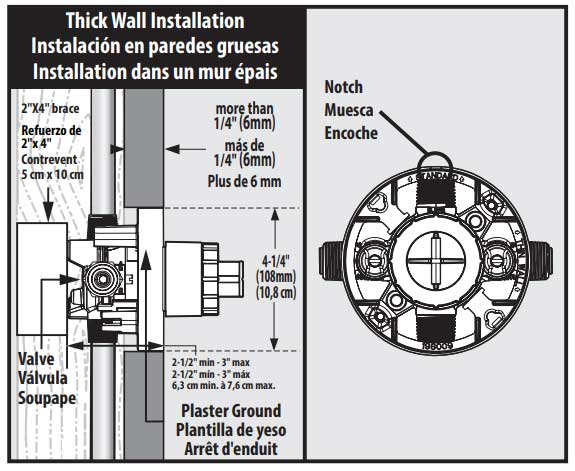
Note: For thick wall, valve is mounted to a brace.
Plaster ground is simply used for setting depth and hole size.
Important: For thick wall: If hole is < 3", remove plaster ground before installing wall.
Thick wall installation: (Most installations) The thick wall installation method is used when the tub/shower wall is greater than ¼ inches thick. Thick walls are usually built up with materials such as cement board, drywall, tile etc. The plaster ground will aid with alignment and can remain attached to the valve until the valve has been positioned and secured.
1. Drill a 4-1/4 inch hole in the wall (the same size as the plaster ground) in the location shown in the installation schematic. This hole will help support the valve during installation and allow access for future servicing if necessary.
2. Position the plaster ground in the hole so that its printed face is flush with the finished wall. This will ensure that the valve will be at the proper height to accept the trim.
3. Mechanically secure the valve to the wall frame members by the use of straps (not included) or attaching the valve mounting holes to a cross member behind the valve thru mounting tabs on the valve.
4. Attach the water connections to the valve.
5. When the trim is available, remove the plaster ground.