DavidKr
New Member
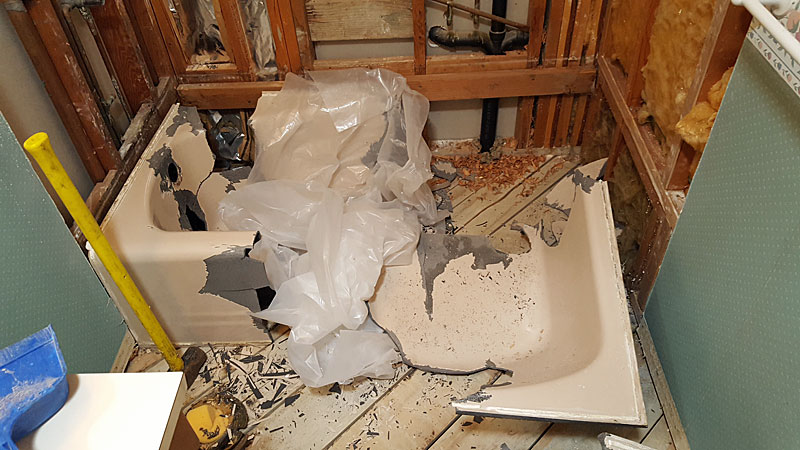
OK, I'm struggling to figure out an acceptable approach to solve my dilemma, I have a 2nd story kid's bathroom with an alcove Kohler Villager cast iron tub. House was built in 1987, Minnesota 2X6 construction on the walls, back is exterior. The builder installed tile just started dropping from the wall one day from the CBU. I stripped the tile, CBU (1.5' up) and sheet rock, so the surround is to the studs, with maybe 1.5' sheetrock remaining at the top. The tub installation was nothing like what I see today when I research (no vapor barrier, CBU only 1.5' up, thinset direct on CBU/sheetrock..etc). The builder did stuff pink insulation on all four sides of the tub, maybe a cold winter approach. Luckily, there was no real moisture damage (some rusty screws, nails, and minor discoloration stains on the visible side of the CBU, studs/insulation are dry and in great condition).
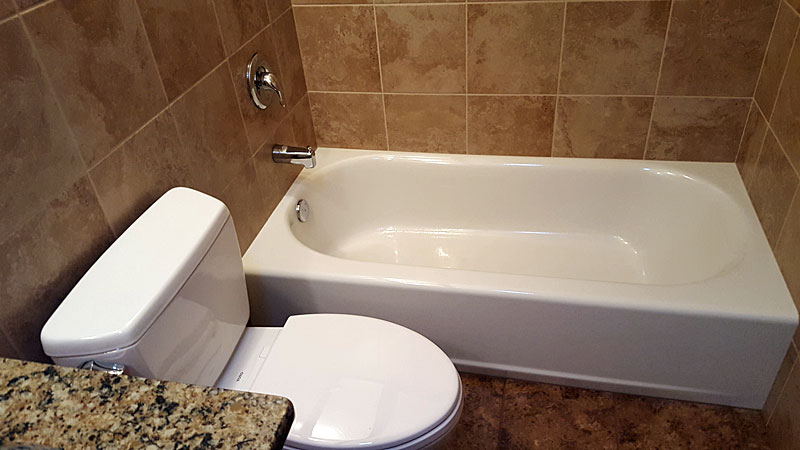
OK, so now the dilemma, I want to change the tub color to white, I am fine with the tub (it performs, doesn't creak, low profile is fine..etc). It's in good shape, it's just the color is an ugly yellowish beige, I could live with the ugliness of it, but the wife is adamant it has to be white. The use would be daily showers by kids. Here's what's mulling through my head, and I'm spinning on what to do just to change a color.
Option 1: Easiest - Have a local reputable refinisher to refinish to white (5 year warranty), and accept it won't last as long as what I have now, try to keep it clean with the recommended cleaners. It will need to be redone in 1 to 20 years, so a crap shoot. I'm sure the warranty would be difficult to collect on if there is an unexpected early failure. Given all the horror stories on the internet on the refinish peeling up, is this really a bad idea, only to be used by house flippers? $550 cost, and keep having to spend this every X years.
Option 2: DIY - Replace with an Americast, I could handle this tub, but I'm a little concerned about the drain hookup access with a 2 story. I could a call a plumber if I'm not comfortable when I get into it. Concerned about creaking, and thinking of a mortar bed. Also concerned it's not as durable as option 3, but realize it's probably better than option 1.
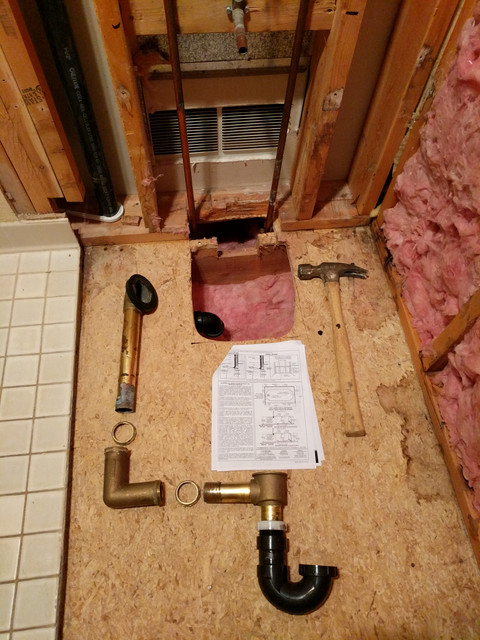
Option 3: Hire Professional - Replace with another Villager, yes, all that work just to effectively change a color. No way could I handle over 300 pounds by myself, with no experience with tub installs. I would just hire out the tub install and hookup, assuming I can find someone who wants to deal with a 2nd floor CI install. Maybe the old drain and overflow would just line up if the villager mold hasn't changed in 30 years, and just replace the gaskets. The old install did have leveling done by 2X4 blocks nailed diagonally under the lip in the back corners, haven't seen that method in any of my research. Plumber quoted 2 man crew T&M, 220/hr + 75 fee. I have no idea, but I would think it would be 2 to 5 hours depending on how easy the hook up is, hopefully they don't have to tear up adjacent bedroom floor for the drain. How nasty can this get with the drain hookup, am I in the ballpark with the hours? Can it be more invasive to fit a drain with a heavy tub? I really can't imagine fitting a drain with something this heavy, working around existing finished construction. Last thing I want is an extensive and costly project.
So, at this point in my excessive thinking, I'm between 1. and 3., and have held myself from grabbing the sledge hammer and demoing the existing tub out. Most curious on option 1., is it a bad idea? Just to change a color, 3. seems like a lot of work and expense just for a color change.
Thoughts, any advice appreciated from a plumber's perspective and what you folks really see with these approaches and aftermaths.
OK, so now the dilemma, I want to change the tub color to white, I am fine with the tub (it performs, doesn't creak, low profile is fine..etc). It's in good shape, it's just the color is an ugly yellowish beige, I could live with the ugliness of it, but the wife is adamant it has to be white. The use would be daily showers by kids. Here's what's mulling through my head, and I'm spinning on what to do just to change a color.
Option 1: Easiest - Have a local reputable refinisher to refinish to white (5 year warranty), and accept it won't last as long as what I have now, try to keep it clean with the recommended cleaners. It will need to be redone in 1 to 20 years, so a crap shoot. I'm sure the warranty would be difficult to collect on if there is an unexpected early failure. Given all the horror stories on the internet on the refinish peeling up, is this really a bad idea, only to be used by house flippers? $550 cost, and keep having to spend this every X years.
Option 2: DIY - Replace with an Americast, I could handle this tub, but I'm a little concerned about the drain hookup access with a 2 story. I could a call a plumber if I'm not comfortable when I get into it. Concerned about creaking, and thinking of a mortar bed. Also concerned it's not as durable as option 3, but realize it's probably better than option 1.
Option 3: Hire Professional - Replace with another Villager, yes, all that work just to effectively change a color. No way could I handle over 300 pounds by myself, with no experience with tub installs. I would just hire out the tub install and hookup, assuming I can find someone who wants to deal with a 2nd floor CI install. Maybe the old drain and overflow would just line up if the villager mold hasn't changed in 30 years, and just replace the gaskets. The old install did have leveling done by 2X4 blocks nailed diagonally under the lip in the back corners, haven't seen that method in any of my research. Plumber quoted 2 man crew T&M, 220/hr + 75 fee. I have no idea, but I would think it would be 2 to 5 hours depending on how easy the hook up is, hopefully they don't have to tear up adjacent bedroom floor for the drain. How nasty can this get with the drain hookup, am I in the ballpark with the hours? Can it be more invasive to fit a drain with a heavy tub? I really can't imagine fitting a drain with something this heavy, working around existing finished construction. Last thing I want is an extensive and costly project.
So, at this point in my excessive thinking, I'm between 1. and 3., and have held myself from grabbing the sledge hammer and demoing the existing tub out. Most curious on option 1., is it a bad idea? Just to change a color, 3. seems like a lot of work and expense just for a color change.
Thoughts, any advice appreciated from a plumber's perspective and what you folks really see with these approaches and aftermaths.
Last edited: