These are actually good questions.
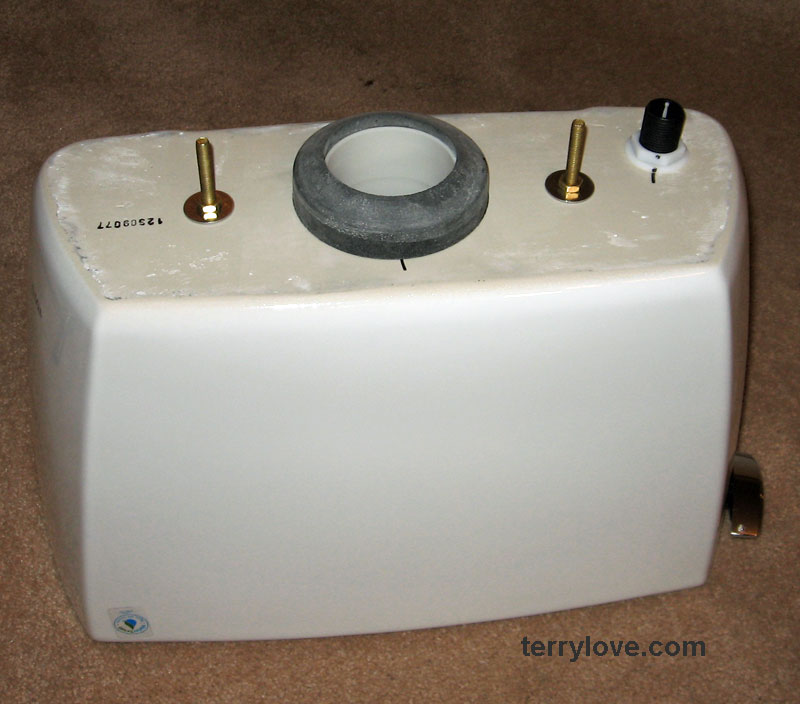
First: single-nutting vs double-nutting the tank installation. The preferred way explained on this forum is the double-nut approach, and it's traditional. You take the rubber washer and slide it over the bolt. You insert the bolt into the tank. Only the bolt head and rubber washer are inside the tank. To ensure that this connection stays straight and firm, you put a metal washer and nut on the outside of the tank. This compresses the bolt head absolutely-vertically into the rubber washer, and seals the bolt hole in the tank. So, when you go to tighten the tank onto the bowl, you don't end up applying pressure more on one side of the washer than the other, or pulling the tank down any way but vertically. Now, you mount the tank onto the bowl, and use a rubber washer, metal washer, and the other nut underneath the bowl to do so. This is the way Toto recommends it. It's the way that Fluidmaster and Korky did their toilet rehab kits for years. Then, the manufacturers found out that lots of DIYs and some pros would just chuck the extra washers and nuts, using only one of each, because they don't read directions. Korky claims to have done lots of research and swears that there is no advantage to double-nutting, but admits that they saved some $$ by revising their kits to eliminate the extra set of hardware. Personally, I think you are better off long-term double-nutting. My own experience with a Korky kit was that the first go-round had the bolts at something of an angle to the bottom of the tank by the time I was done slowly tightening the tank down bit by bit to compress the tank-to-bowl gasket and get a firm connection between tank and bowl; it didn't leak around the bolts, but in a few years, it most likely would have. I detached the tank and started over. It took a whole lot of extra care to get that bolt-head/washer seal perfectly-vertical while tightening just the one nut from underneath the bowl, in part because the bolt was having to penetrate two holes but being held in place only by the tension applied from underneath the furthest hole. I love the folks at Korky but I disagree with their analysis, if for no other reason that it makes it harder to get it right the first time. At a minimum, double-nutting is chicken soup -- can't hurt. And Toto gives you the hardware you need to do it right. On the Jamie instructions, he doesn't really say not to do that; I think it's subsumed in the instructions about using the hardware.
Second: Double-nutting the closet bolts. Most manufacturers don't tell you to do this. The way you see in the Toto instructions is to stand the closet bolts up in the flange, to the extent that they will stand, then mount the toilet on them, then on top of the toilet put the plastic base cap, washer and secure with the nut, cut the extra length of closet bolt with a Dremel or hacksaw, and install the cap on top. What many pros do (and Terry is one) is to use that extra nut and washer to secure the closet bolt to the flange first before mounting the toilet. Instead of just having it dangling there loosy-goosy trying to stand up in the flange, you position it where you want it and use the extra washer and nut to secure it to the flange before you put the toilet on top. That way, they stay standing up straight where you want them when you put the toilet on top. Some kit manufacturers now give you a little plastic sleevy thing to prop them up. The nut and washer work best, and for a first-timer, they actually cut the time, even though you have to take time to attach them.
Bottom line, neither way is wrong, but the consensus on here (and Terry's way) is to double-nut both connections. As you can see, there is no downside to doing it this more cautious, thorough way, and logical reasons for doing so.
")