How to make a copper cap seamless and flat

Users who are viewing this thread

Krista

New Member
Messages
1
Reaction score
0
Points
1
Location
New Orleans
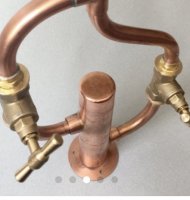
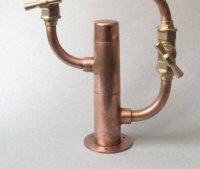
Hello! I want to make a copper flower vase. In my head it is as simple as needing a copper pipe, copper cap and making the seam water tight. My question for you is how do I make where the pipe and cap meet as seem less as in the photo I shared? Most research i'm finding online the copper cap leaves a lip. I cannot figure out how to make it smooth and seamless like the photo. (The photo is not of a vase I only shared it to show the copper work I'm talking about.)
 

Attachments

  • IMG_6569.jpg
    IMG_6569.jpg
    44.8 KB · Views: 238
  • IMG_6568.jpg
    IMG_6568.jpg
    31.9 KB · Views: 259

Terry

The Plumbing Wizard
Staff member
Messages
29,942
Reaction score
3,459
Points
113
Location
Bothell, Washington
Website
terrylove.com
The photo shows copper fittings butted up tight. Most likely glued together. There are seams there between the fittings, but snug.
 

Reach4

Well-Known Member
Messages
38,892
Reaction score
4,436
Points
113
Location
IL
As Terry said, glue the joints, probably with epoxy. However if you want to solder and not have much if any showing, some ideas come to mind:

If the pipe is big for your vase, apply the solder inside. Or maybe drop some solder indifr, and heat externally. Solder should wick into the fluxed gap but should not climb out on the pipe. Don't flux the part that you don't want the solder to climb into.

For some things there are pre-soldered. With the solder inside, it is less likely the pipe will get much solder outside of the fitting. These are somewhat visually different from what you show.

Viega Propress does not use solder. These are visually different from what you show.

You could find something to resist the solder. Maybe experiment with covering the area to not be soldered with PTFE (Teflon) tape.​
 

LLigetfa

DIYer, not in the trades
Messages
7,507
Reaction score
581
Points
113
Location
NW Ontario, Canada
Pipe will have a smaller OD than the cap so it will not be flat. The cap is meant to slip over the pipe so the ID of the cap matches the OD of the pipe. To make them both the same OD, you would need to expand the pipe similar to how automotive exhaust pipes are expanded for one to fit in the other.
 

Jadnashua

Retired Defense Industry Engineer xxx
Messages
32,770
Reaction score
1,190
Points
113
Location
New England
Solder should end up permanent, epoxy may or may not. You could buff any solder off, but you might see a thin line of it where the fittings come together. As Terry said...on that picture, there are three fittings installed over a pipe, all butted together...the cap (and any other fitting) has to be larger than the pipe to slide over it so there's enough room for a decent solder joint rather than a simple butt joint.
 
Messages
66
Reaction score
1
Points
8
Location
Ioway
I think I am seeing two reducing tees and a cap. Each tee is female on each end, and the cap is female. I expect there is an inch-long section of tubing providing maleness inside each joint to hold the joints together. The joints could be glued or soldered together. If soldered, the outsides of the fittings have been somehow shielded from solder, or the excess solder has been removed from the outside by something like sanding and polishing.
 
Top
Hey, wait a minute.

This is awkward, but...

It looks like you're using an ad blocker. We get it, but (1) terrylove.com can't live without ads, and (2) ad blockers can cause issues with videos and comments. If you'd like to support the site, please allow ads.

If any particular ad is your REASON for blocking ads, please let us know. We might be able to do something about it. Thanks.
I've Disabled AdBlock    No Thanks