Sink Drain Too High --- HELP !!

Users who are viewing this thread

Terry

The Plumbing Wizard
Staff member
Messages
29,942
Reaction score
3,459
Points
113
Location
Bothell, Washington
Website
terrylove.com
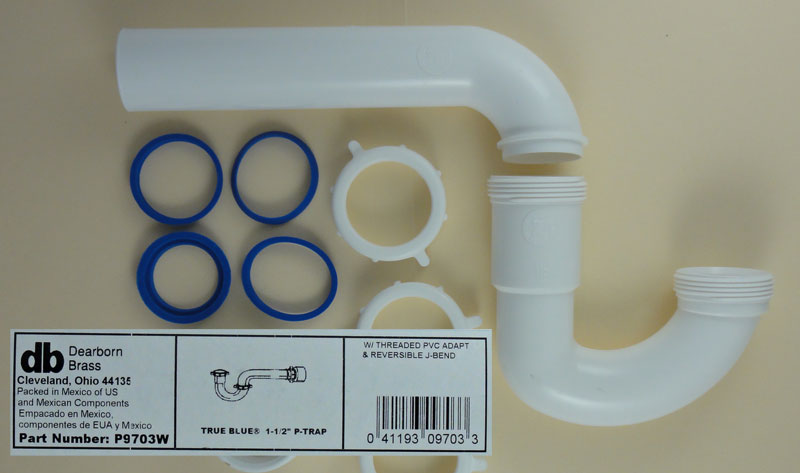
p-trap_reverse_dearborn.jpg


I carry these on the vans.
 

Reach4

Well-Known Member
Messages
38,903
Reaction score
4,439
Points
113
Location
IL
Any theory on why the U bottom part is not more symmetric (below the larger diameter part)?
 
Last edited:

Windsurfer

New Member
Messages
14
Reaction score
0
Points
1
Location
Michigan
Hi Terry, just noticed your location. I graduated from UW in 1973, retired now in Michigan. I almost bought an East Lake townhouse a few years back, but chickened out in the last minute. Seattle real estates has become so expansive.
I have drawn a new plan .. better I think.
Can you, REach4, or anyone give me some ideas on how to add a washer standpipe to this plan ?

newplan.jpg
 

Reach4

Well-Known Member
Messages
38,903
Reaction score
4,439
Points
113
Location
IL
Last edited by a moderator:

Windsurfer

New Member
Messages
14
Reaction score
0
Points
1
Location
Michigan
Yes, better flow direction ... thanks for pointing out.
Wow, that is a hell of a lot of good info in that reference.
My washer is located on the right, between the vertical drain pipe and the laundry sink. I wonder if I can put a standpipe in place of the laundry sink drain.
And add a new vertical 2" pipe to take the laundry sink drain down to the branch drain in the basement. The branch drain runs right along the wall and can be easily reached from the sink. The current 2" vertical drain is the only pipe feeding this branch drain. Or is it going to be as easy as I think ? Sorry that I'm probably not using the correct terminologies to describe it.
 
Last edited:

Windsurfer

New Member
Messages
14
Reaction score
0
Points
1
Location
Michigan
Thank to the forum and in particular Reach4 and Terry, I went from completely clueless to actually able to finish this project.

Before and after :
SinkBefore.JPG SinkAfter.jpg

PipeBefore.JPG PipeAfter.JPG

Here I am using a repair coupling to check for alignment and height. It is great for checking pipe-to-pipe, pipe-to-elbow connections before gluing.

Alignment.JPG

The final piece is the only place I needed a repair coupling. I didn't realize that you have to cut the pipe at an angle in order to fit without a gap. Not having the angle cut, I had to grind a bit off the pipe. That left a .25" gap on one side. But the coupling covered it nicely.
LastStep.JPG
 

hj

Master Plumber
Messages
33,603
Reaction score
1,042
Points
113
Location
Cave Creek, Arizona
Website
www.terrylove.com
quote; Any theory on why the U bottom part is not more symmetric

It is a Cycloid, which is the fastest way for something to move by gravity. Your repair coupling was installed improperly if you had to cut the pipe at an angle. The ends are supposed to be SQUARE so there is NO gap on the inside.
 

Windsurfer

New Member
Messages
14
Reaction score
0
Points
1
Location
Michigan
The bottom of the pipe had to be put into a san-t while I slide the top to align to the pipe above. Seems to me a slight angled cut would work, or make one more straight cut.
 
Top
Hey, wait a minute.

This is awkward, but...

It looks like you're using an ad blocker. We get it, but (1) terrylove.com can't live without ads, and (2) ad blockers can cause issues with videos and comments. If you'd like to support the site, please allow ads.

If any particular ad is your REASON for blocking ads, please let us know. We might be able to do something about it. Thanks.
I've Disabled AdBlock    No Thanks