My Ensuite Renovation WIP

Users who are viewing this thread

Suceress

Active Member
Messages
320
Reaction score
37
Points
28
Location
LA
I realize that my other thread about the fiberglass tub got confusing because it started out about a different bathroom and I moved on to my ensuite. I have two ensuites back to back. I'm not sure when the original house was built but the ensuites and bedrooms attached to them seem to have been added in the late 1940s (Feb 1947 according to writing on a beam under the house). The bathrooms were renovated sometime in the 70s. Both got printed wood paneling with vertical stripes.

The vanity is made of plywood and is built in. It originally had carpet but I tore out as much of it as I could (some is still under the vanity). There was a moisture barrier between the subfloor and underlayment plywood. I ripped out the carpet and we had cheap vinyl sheet installed. When the septic tank backed up it flooded the bathroom and ruined the underlayment (the other bathroom didn't have that so it ruined the subfloor).

I pulled the toilet to find carpet and carpet pad underneath. The wood was like mud. I removed the entire damaged section and replaced it with 1/4" lauan that was then coated in wood sealant. It wasn't the same level as the old plywood so I tried to level it with leveling mix (employee at the store said it was self leveling but it wasn't). It was also a bad batch full of clumps. It came out like the surface of the moon with sharp points sticking up and was awful. My friend was helping me and poured the stuff even when I noticed there were lumps after I said it looked bad. I tried hammers, chisels, sandpaper, etc to try to smooth it out but the additive made it too tough.

Round 2 of the leveling was without additive and after we used diamond tipped grinding tool to grind down the high spots and smooth it out as best as we could. The layer to fill in the spots was much weaker than the stuff with additive and was a bit powdery (but it could be sanded and chiseled). I decided to try round 3 on my own. I screwed up and got the ratios mixed up and had to sift lumps out of the powder. Despite my screwup, I got it to the right consistency and got it as smooth as I could (using additive for strength). It's not perfect but its better than nothing and I decided to leave it alone.

This project has gone on way too long (over a decade) and while I've got the floor fixed and toilet installed, I am currently working on the tub walls. I'm going to post some pics of the progress. I wish I had pics of the original ugly carpet. It was beige at one point but the tenants that lived here while we were overseas never cleaned it and it was really gross.

This is what it looked like after the toilet was pulled out (after the flooding).
1679764184006.png
1679764211555.png

Botched floor leveling job attempt 1.
1679764365040.png

2nd coat after grinding
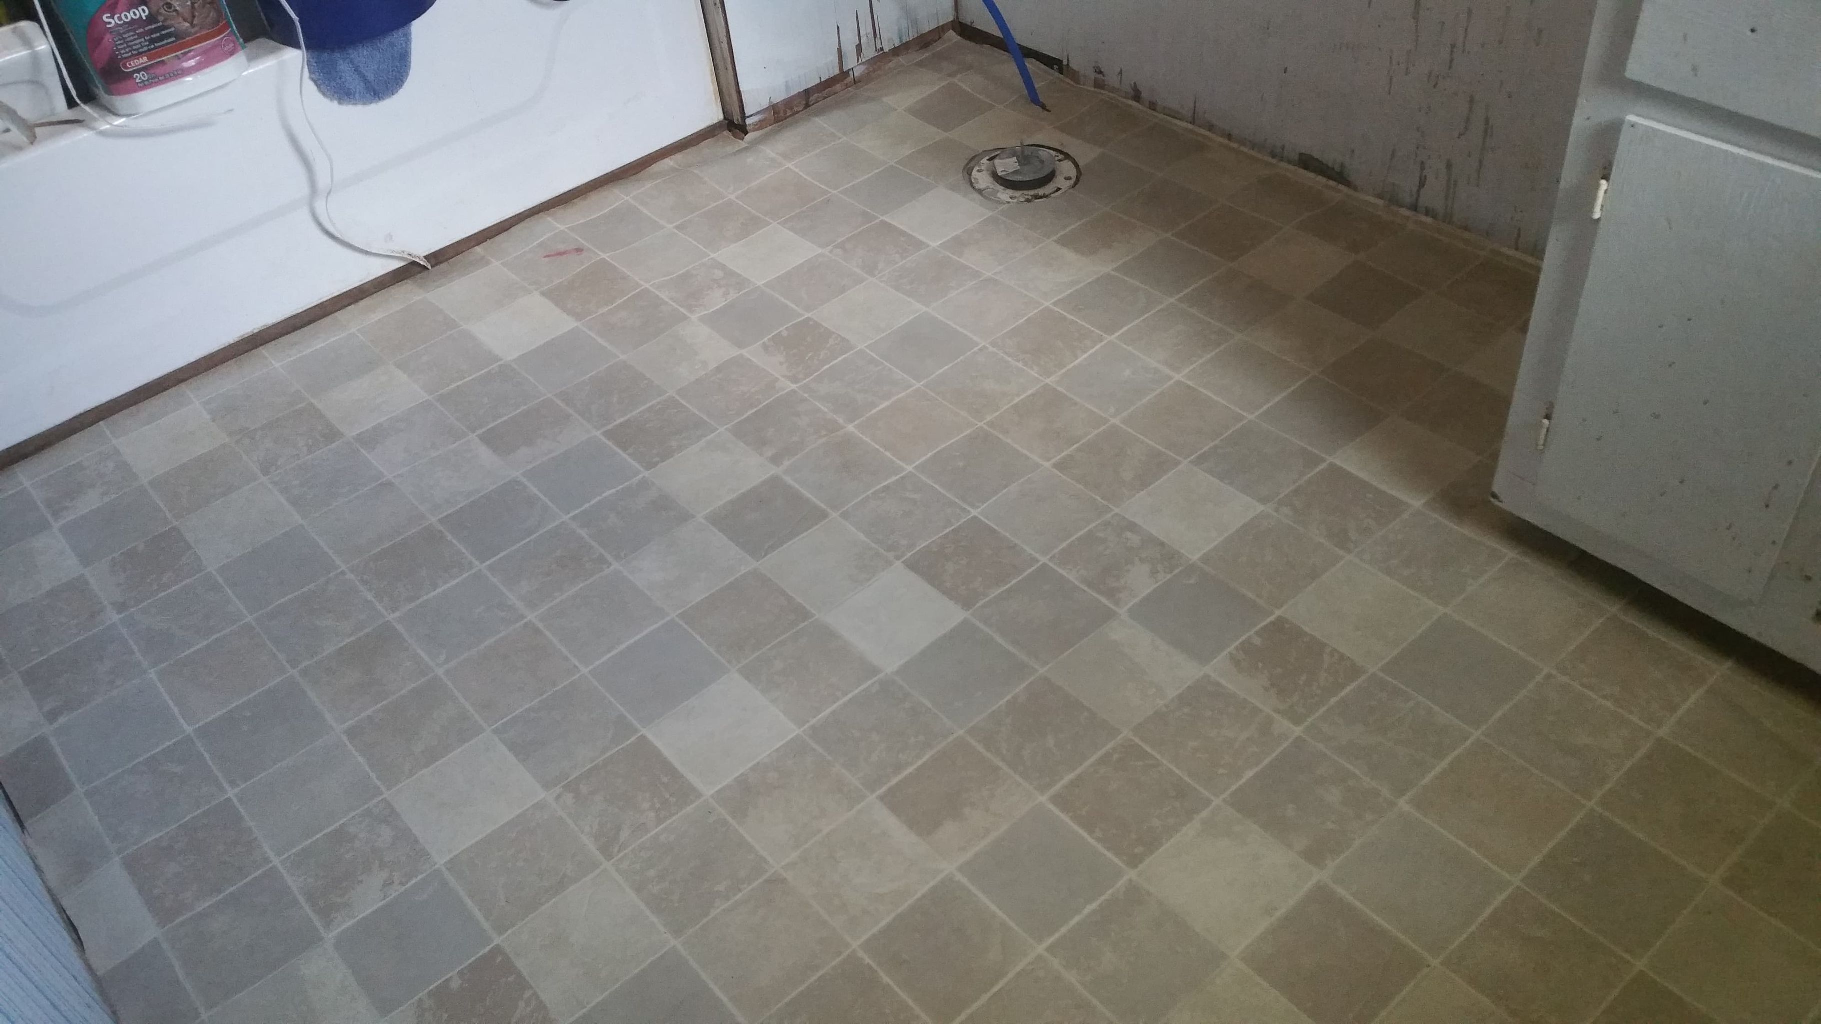
1679764439946.png

Final coat
1679764942450.png

I installed the vinyl sheet by myself (which was a royal pain). It's looselay so I did perimeter tape. I'll be adding baseboards later. The part of the wall I painted white will get wainscoting.
94220-1663041373891.png

Sketch showing layout of this room and adjacent bathroom. I have wall thickness wrong because I didn't realize its way thicker than expected.
1679764547477.png

Rough sketchup drawing of the room
1679764851942.png

One problem I'm facing is that the idiots who did the renovation in the 70s cut all the way through a joist so I will have to remedy that with a box and sistering it up a bit. I will go with a direct drain instead of the regular kind. It appears to be an above the floor drain so its going to be tricky to access it and get the holes drilled since I suspect there is mortar under the tub (it is not even nailed in place but it won't budge).
1679764701806.png
 

Suceress

Active Member
Messages
320
Reaction score
37
Points
28
Location
LA
I forgot to mention that a rare winter freeze ruptured ALL of the pipes under the house so we replaced it with PEX. Had some runins with a 240v cable that is not insulated properly & a rattlesnake that thought pex pipes were its friends & got in the way (as a note, it no longer makes a rattling sound but it makes a buzzing sound like a wasp). So, the old PVC (yeah, it was pvc for cold and cpvc for hot) got torn out & replaced with pex with cinch fittings.
I added a floor flange (it has a split in it so I could fit it over the pex). I changed out the flush lever because it is all metal construction & the default kind that come with a Toto Drake tends to break after 5 to 6 years because it has plastic. Had 2 levers break in 11 years in the other bathroom.
1679765487240.png

The vanity had served as storage for a very long time so I cleaned it off (one of the doors fell off bc the screw hole stripped out-- need to fix it and put the door back on). The box of leveling powder was on the floor to flatten a crease-- it worked after leaving it for a few months.
1679765595098.png

Before and after of cleaning the sink: Vinegar & baking soda ftw-- plus a pumice stone. The faucet will be getting replaced with a taller one eventually.
1679765680807.png
1679765709727.png

Moved stuff around during renovation- the tub had been filled with stuff-- including that dresser.
1679765848593.png

This laundry cart came in handy but it was a royal pain to put together.
1679765923452.png

Midway through cleanup-- you can barely see the back wall of the surround was falling apart.
1679766007228.png
1679766118902.png

It was pretty gross looking after I tore the wall panels down.
1679766239241.png
 

Suceress

Active Member
Messages
320
Reaction score
37
Points
28
Location
LA
Behind the glue up surround and ruined mural panel (used to have ducks or swans on it) was this messed up plywood.
1679766334295.png

Behind that was bug-chewed tongue and groove boards.
1679766415572.png

I used a mix of vinegar and baking soda that I left to sit overnight to help clean out the hard water stains and old adhesive.
1679766501696.png
1679766586022.png
1679766647528.png

The gouge was from the tenants. Not sure how they did it, but I got a repair kit for it that I will use once the cementboard is up.
I initially hung plastic up and was going to put cement board directly over that but the tongue and groove felt weak & broke apart in spots. Decided to pull most of it out. It looked like this and had holes and stuff.
1679766733831.png

I discovered that the studs were all messed up. Some were chewed, others not done properly. Not spaced properly. 2x4s stacked on top of one another and so forth. I wrote some notes inside the wall for the next people who open it up.
1679766857689.png

My best friend helped me with removal and putting in new studs and furring strips. Left the bottom row of the boards bc they were OK (and too difficult to remove). Used one good board for the corner grab bar location.
1679766990105.png
 

Suceress

Active Member
Messages
320
Reaction score
37
Points
28
Location
LA
Sorry to keep posting, but I want to get the pictures in and I think there are limits on the number per post.
I added more furring strips and some paint stirring sticks as well as some plywood to cover gaps. I measured and marked screw locations and put plastic in the tub with painter's tape that had the vertical measurements written on it and a mark at the horizontal location.
1679767178810.png

I got the bottom back wall piece of cementboard in the tub and coated all 4 edges with two coats of Mapei Aquadefense.
1679767393155.png

I'll be putting up a Mustee Durawall 350 surround. Side panels extend 6" on to the back wall and 29" on to the side walls so bumping the wall out more will get the edges closer to the end of the tub. I chose cementboard because it was more water resistant, less expensive, smaller in size (easier to handle), and rated to have something glued to it. Manufacturer of the purple drywall said it would delaminate if I tried to glue a surround to it.
1679767549041.png

Wallset out of the box (the one end panel wasn't wrapped in plastic like the others were).

1679767618894.png

Instructions for the side panel installation (should I put caulk under the nail head on the side that will go over cementboard)?
1679767731751.png

I also have to deal with trying to make the walls square. Wall on the right isn't so bad. I just have to get it flush with the flange (as I will have the boards overlap the flange).
1679767929180.png

But there is a significant gap on the left side
1679767984399.png

I'm trying to figure out the best way to square that wall up. Its almost 3/4" at the widest. Additionally, both side walls lean back a bit so I will have to shim more at the tops as well.

Any suggestions? I'll be putting plastic over the wood parts so no wood will touch cementboard.
 

Suceress

Active Member
Messages
320
Reaction score
37
Points
28
Location
LA
I did a dry fit of the one cementboard panel. It needs some tweaking and I added more blocking behind.
1679797902078.png

I'll have to re-do the taping and plastic when it is time to do thinset, but first I have to get the walls squared up, shimmed, etc. I still want to put plastic moisture barrier behind it to keep moisture out of the wall cavity. I'm going to sprinkle diatomaceous earth in the cavity (it kills bugs by drying them out). Still trying to figure out what to write on my message that I will put in a bottle. I realized that I should have gotten pics of my drawings sooner because they are covered up.
 

Jeff H Young

In the Trades
Messages
8,893
Reaction score
2,221
Points
113
Location
92346
Suceress,
I admire your persistance been a long time but doing what you can and not giving up and know you care about getting this done best you can
 

Suceress

Active Member
Messages
320
Reaction score
37
Points
28
Location
LA
Suceress,
I admire your persistance been a long time but doing what you can and not giving up and know you care about getting this done best you can
Thanks, Jeff. I wish I was able to move faster on it. My friend who normally helps is on his first vacation ever. He's only been one state over and never been out of this state overnight but his half-sisters booked a cruise so he won't be back for at least a week and he has to get teeth pulled when he returns. He won't be able to do any heavy lifting after that. I can see if I can get my brother to help once I have the walls shimmed out. I went and added more screws to the cementboard but my hand cramped up and my back is fighting me today. Waiting for the meds to kick in to loosen my back up. It's so tense I can't even stand up straight. I'm about to put a heating pad under it. But, I'm happy with what little progress I've made. Once my back cooperates I'm going to see how far the mustee side panel comes out.

On another forum someone suggested using hot glue. My mother says she has a few of different sizes in storage bins in her room, so when my back unlocks I'm going to see if she's awake and if she can help me look for one. I haven't used hot glue in well over a decade, but if it helps to shim out the wall, I'll use it. LOL. I may use roofing nails if need be because I got a bunch of those and only need about 8 of them for the surround.
 

Suceress

Active Member
Messages
320
Reaction score
37
Points
28
Location
LA
I ended up getting my own hot glue stick (Gorilla brand) and glue sticks & went to town with craft sticks and paint stirring sticks. I also got a new phone with a much better camera. I think my old phone was from 2014 & was dying. My friend was transferring data from old to new for me and said he didn't know how I didn't get a new one sooner bc the old one barely responded. S23 Ultra has amazing cameras on it.

My shimming is not complete and I noticed the right side wall bows out in the middle. Left wall is at an angle to the tub so I had to shim like crazy on that side. I had to order longer screws just in case. I still need to mark locations of nails and stuff on the walls so I don't hit them with screws.

I wasn't happy with the fit of the back cement board so I used some wooden craft slats that I found on clearance and some craft sticks (look like large popsicle sticks). I shimmed until the board was perfectly level and popped screws in all 4 corners. I'd only had one screw in the left upper corner so I could pivot it a bit without it falling on me.

Then I dragged another cement board over. 35lbs doesn't seem like a lot but my left arm still doesn't have full strength back. Still working on getting full range of motion back with it. Anyway, I could get the right side to go up but not the left and I nearly fell into the tub when it started tipping. Managed to keep it from falling and got it to slide. Had to use my foot and lift up from below to get it onto the toile and then slide it to the tub. I initially just set it in place tipped slightly and with tape at the top to keep it from falling over. Once I recovered a bit I went back and put spacers underneath. Stupid plastic things kept sliding. Eventually I got a screw in to keep it in place and then did a dry fit with the wall panel to mark the edge so I would have a general idea of where I could pop a screw in. When I remove it I need to put marks where the shims are. Got 2 screws in it and made sure its level at the top.

Then I got the second board in. It was easier to get it into the tub because I could lead with the right to lift it. Struggled a bit to get it in place bc some stuff fell behind it. Was putting a screw through the inner corner but it kept slipping out of the bit and falling. Board fell on my head at one point when I was retrieving a screw but I'm hardheaded. LOL. Got it shimmed to level, did a dry fit with wall panel, marked a line. Pencil broke. Had to get another pencil and mark again. Then popped a 2nd screw in. That left wall panel is warped but I will have to straighten it out with screws.

Not going to try the upper back panel by myself. Friend is supposed to come over to help tomorrow.

Pics of the shims (taken with my old phone)
1682691604560.png
1682691628674.png
1682691707595.png

Now with the new phone:
1682691889440.png
1682691984058.png
1682692028161.png
1682692087548.png

I used the smaller level on the left side because the larger one kept falling on my head when I was making adjustments. LOL.
My ceiling tiles are ugly. Anyway, I'm hoping nothing will interfere with my friend coming over tomorrow morning.

As an aside, I decided to make curtains for my window. I'm going to make curtains for the window in my mother's bathroom as well.
 

Suceress

Active Member
Messages
320
Reaction score
37
Points
28
Location
LA
Thanks. I'm currently waiting for my friend to wake up so I can go pick him up and have him help me with that last board, getting everything plumb and square.
 

Reach4

Well-Known Member
Messages
38,858
Reaction score
4,428
Points
113
Location
IL
A laser level can be useful. Some use an internal pendulum to control emitting vertical and horizontal lines.
 

Suceress

Active Member
Messages
320
Reaction score
37
Points
28
Location
LA
I've looked at the laser level prices and seen how much effort it takes to use them and decided I'm better off with a manual level. I'd probably drop the laser one and break it.

We got a lot done. My friend had to do more of the heavy lifting and cutting and such. We had to take the side boards down to make it easier to fit the upper piece. Did a dry fit of the surround to mark where to cut. Put the sides back on and another dry fit for marking for cuts.

While my friend took a breather I took them back down and vacuumed up debris. Having the bottom board perfectly level made it easier to get that top one up, but getting the spacers to stay in place was tough. I ended up putting screws in the gap to hold the top board up and keep it pressed against the wall. I cleaned the edge of the tub and flange with alcohol to get it free of debris and adhesives. Dries faster and doesn't leave any residue.

Plastic sheet went up next. Ran out of tape (used 2 rolls) and couldn't find my 3rd roll that I know is around somewhere and will probably turn up later. Couldn't find my box cutter (found it this morning). Used a cementboard scoring tool for cutting but it was messy & took a long time to cut.

After plastic sheet was taped up we got the boards back in place and fully secured. Friend took another breather while I put in more screws. I took breathers while he was working on stuff- although when he was securing the side boards I was handing him screws.

I popped small holes through the wood where the shower arm and controls will go. Shower arm will be above the surround and cementboard. I put toothpicks on the holes so they can be located from the other side later on. I want to drill through from the other side with a small bit first and then drill through from the finished side with the correct size holes. There is already a hole for the tub spout in the wood.

When we got the surround up again we discovered that the cutting had left a little too much on the left side edge of the board so I had to mark it again (my pencil broke during the marking). Using the scoring tool was taking forever so we switched to an oscillating tool that worked a lot faster. The edges ended up not quite coming out as far as the surround but that is ok because the L-bead trim will cover any gaps and it is designed to have a gap between the edge of the board and the L part.

So, now everything is secured and I just need to take the surround down, put aquadefense on edges and seams, tape and apply thinset, and then do another dry fit.

Here are some updated pics (I forgot to take one after all of the cementboards were up before the wallset was dry-fit). I'll get a pic of that later..
1682865065937.png
1682865143767.png

This last pic is with the L-bead trim temporarily in place.
1682865188127.png
 

Suceress

Active Member
Messages
320
Reaction score
37
Points
28
Location
LA
Got the aklakai resistant mesh tape up:
1683233534988.png

Dry fit of side panels so I could put up the L-bead trim.
1683233609219.png

With center panel dry fit.
1683233903374.png

I did secure the right side trim (not the top though) and left side, but the trim and panel had shifted so I need to remove the staples and move it in a bit. Will get pics of that later.

Have to take the panels down again and work on the thinset but my coordination has been off and I want to do it when I feel confident enough.
 

Suceress

Active Member
Messages
320
Reaction score
37
Points
28
Location
LA
Been having some stress with my disabled mother getting low blood sugar and sort of sundowning in the middle of the night. I've been having to make sure she get sugar because she gets too confused and last night she fell twice. She's not hurt, but it's concerning.

I adjusted all of the trim and secured it. The right side trim sticks out away from the panel in the middle and when I put the level on it, it is plumb with the lower part of the board. So I need to fill in with thinset under that portion of the trim to make the panel plumb for the panel to adhere to it well.

My body absolutely hates me today and my brother and I have some sort of stomach bug. I suspect he picked it up from work bc he was the first one to have symptoms. One of the side effects is lack of coordination. I'm tripping over everything. So, I'm going to wait until I feel like I won't fall on my face doing the thinset.

The piece of tape on the left with two arrows (hard to see) marks the height where I put supports for the grab bar.
1683392903909.png
1683392948997.png
1683392984164.png
1683393012362.png
 

Reach4

Well-Known Member
Messages
38,858
Reaction score
4,428
Points
113
Location
IL
Been having some stress with my disabled mother getting low blood sugar and sort of sundowning in the middle of the night. I've been having to make sure she get sugar because she gets too confused and last night she fell twice. She's not hurt, but it's concerning.ATTACH type="full"]92283[/ATTACH]
Libre 3 can alarm to your cellphone.
 

Suceress

Active Member
Messages
320
Reaction score
37
Points
28
Location
LA
Libre 3 can alarm to your cellphone.
Her insurance refused to cover the Freestyle Libres. I've heard Dexcom G7 is more accurate and can do an alarm as well. She *should* qualify for Medicare to cover that one if the doctor puts in the codes properly to do the prescription for it. But trying to get her to agree to wear one is a pain. She canceled an appointment I set up for her after she had an absolute tantrum like a toddler. I did some light organizing in the bathroom but my left arm doesn't like me after it. I want to grab a few more tools before I start thinset mortar and I want to make sure I have absolutely everything I need to do it. I'll make a checklist:
  • Small bucket for powder (plan to start out with 16 cups powder to slowly pour into the water)
  • Larger bucket for mixing
  • Another larger bucket with a lid to hold the bag of mortar once it has been opened
  • Dry measuring cup for powder
  • Wet measuring cup for water (need about 4 cups)
  • Bucket of water for rinsing things or in case more water needs to be added
  • Mud knives/blade/spreader thingies (got 4", 6", and 12")
  • Plastic and tape to make sure there is no splatter of anything going on the tub, floor, toilet, or walls
  • Sponges (just in case I need them for anything)
  • Gloves
  • Coveralls
  • Framing square
  • Leve
  • Shop towels
  • Tack cloth
  • Spray bottle with water (the one I have has decent pressure-- I use it to give the dog baths in the sink since the faucet is too low)
  • Sand paper
  • Shop vac

Anything I'm missing?
Editing bc I've been saying thinset when I mean modified mortar. I'm a derp.
 
Last edited:

Suceress

Active Member
Messages
320
Reaction score
37
Points
28
Location
LA
I made an attempt at spreading mortar and I suck at it. I used the mix ratio recommended by mfr but it was too dry. It peeled some of the tape off of the screws & gave me all sorts of trouble. Not even halfway through my mix dried up (I had a lid on it to try to slow the drying). So, my bucket was ruined and quite a bit was wasted. I did manage to clean my tools though and I'll be getting more tomorrow. At least I have a better idea of what I need to do now. I want to finish spreading the stuff and then work on making sure the wall where the grab bar goes is square. I'll probably have to make more than one smaller batch. About half the size this time I think. Good thing I had a bucket of water nearby for rinsing and adding more water. And good thing I spread plastic all over the place. Coveralls came in handy too bc I was dropping the stuff all over and it was landing on me. I resorted to grabbing the mortar with my hand and spreading it over things and then using the knife to smooth it. I'll make half the size for my next batch.

This is what I got done before the stuff dried up in the bucket and wouldn't come out:
1683964115113.png
1683964192176.png
1683964256838.png
 

Suceress

Active Member
Messages
320
Reaction score
37
Points
28
Location
LA
I chilled the water first this time and did half the amount. I also put a trash compactor bag inside the bucket to preserve the bucket. It helped keep the mix colder and slow the setting process. I was having a bad coordination day-- dropping things, tripping, etc and my back was already screaming at me from the mixing so I had some trouble getting it done. Rinsed my tools off immediately after but had to lie down and forgot to scrape everything out of the little tub I used to hold the mortar up while I spread it. I hope that drywall compound is easier to work with. I used a 1" putty knife to cram some of the thicker mortar up under the L-bead leg that wasn't touching the cement board. Then I put mortar on top. It's ugly & looks like someone had explosive diarrhea in the tub, but the trim is secure, holes are filled, tape is covered, etc. I won't say I'm happy, but I'm satisfied with it.

Tomorrow (well, later today) my friend is supposed to come over and help me put up the wallset, cut holes for the plumbing, rough the plumbing in, & get everything hooked up. My back, arms, hands, legs, shoulders, and neck all hate me right now and I'm trying to get to sleep but my brain won't let me relax.
1684140760959.png
1684140798775.png
1684140848901.png
1684140894373.png
 

Suceress

Active Member
Messages
320
Reaction score
37
Points
28
Location
LA
I used the stowsen tub repair kit (designed for small chips) on the big gouge with exposed steel. First attempt was awful. I had to dremel it down and try again with a different color from the kit. Ended up having to mix two colors. They come in small syringes so I had to use a brush to spread them and the stuff was fairly thick. I had to water the brush a bit to get a better texture. It's still ugly, but its better than exposed steel.

Got my friend over to help put up the surround. I couldn't even lift the stupid center panel into the tub. Instead of putting the adhesive on the panels we put it on the walls and then stuck the panels to it. Used a roller to flatten it and get good bonding.

Unfortunately, when I did my dry fit, the panels didn't sit as flush against the back wall as they should so the L-bead trim sticks out too much. Only fix is to use some flat trim to cover the gap (it's 3/4" in some spots). So, I'm going to install PVC boards on top and sides and will use flat trim to bridge from the surround to the trim. I will use some strong construction adhesive and not rely on the adhesive that comes on the trim.
Because the L-bead sticks out over the edge of the tub, I will have to do a dog leg on the side PVC board. I'm also putting up 1/4" thick x 1-1/2" corner trim to cover the outside corner of the alcove where the wall panels don't meet up. I will have to notch one leg of it for the PVC board to fit. I will fill in with caulk wherever there are gaps/imperfections.
1685351246604.png

It will be a Frankenstein mess, but hopefully it will be sealed up. Once the adhesive has fully cured, I'm going to drill pilot holes from the back side of the surround (inside the closet) to mark where the tub spout and controls will go.

This is how it currently looks. I have a LOT of cleanup to do.
1685351287127.png
 

Suceress

Active Member
Messages
320
Reaction score
37
Points
28
Location
LA
I got the holes drilled. Had to go down to the workshop and find a corded drill that was over 20 years old. May even be older than that because my Matrix doesn't have a large enough hole for the shanks. I thought I got ones with 3/8" shank and that should fit, but it didn't. Old corded one worked though.
28948-6f2a8479506a467ad0d15ba7957a848a.png

Little hole should be just big enough for the copper to go through.
 
Top
Hey, wait a minute.

This is awkward, but...

It looks like you're using an ad blocker. We get it, but (1) terrylove.com can't live without ads, and (2) ad blockers can cause issues with videos and comments. If you'd like to support the site, please allow ads.

If any particular ad is your REASON for blocking ads, please let us know. We might be able to do something about it. Thanks.
I've Disabled AdBlock    No Thanks