Pfister 0X8 series shower control - trouble removing Adjustment Gear

Users who are viewing this thread

TommyCee

New Member
Messages
12
Reaction score
0
Points
1
Location
New Mexico
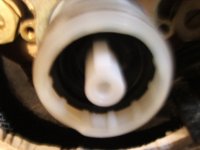
I have a Pfiister 0X8 series valve (single handle) and am trying to remove the Adjustment Gear so I can set the water output a tick hotter. This must be done in order to rotate the stem counterclockwise, and then the Adjustment Gear is to be reinserted.

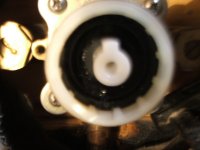
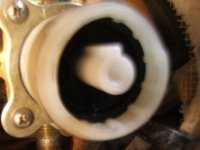
The gear is supposed to be grabbed by a tiny plastic tang located at at "6:00". However, when I grab that tang and pull with considerable force, the gear does not budge. It's quite stubborn and I do not want to tear off the tang !!

Has anyone else seen this frustrating problem?
 

Stuff

Well-Known Member
Messages
1,221
Reaction score
130
Points
63
Location
Pennsylvania
Use your fingernails around the outside edge. That should separate it so you can pull it out. There are a couple of spots that are wider where you can fit a screwdriver to twist/leverage it apart.
 

TommyCee

New Member
Messages
12
Reaction score
0
Points
1
Location
New Mexico
Use your fingernails around the outside edge. That should separate it so you can pull it out. There are a couple of spots that are wider where you can fit a screwdriver to twist/leverage it apart.
Yes, I have tried that. There is only one tiny space to the left of the stem where I can barely get in a small pry tool. The black ring is very tenacious - no alkali build up, though (very clean). Would some 3-in-one oil help?

I'm afraid the black tang will snap off ...

Pfister should have molded one at 12:00 and 6:00 so it could be pulled out parallel !!! Engineering?
 

TommyCee

New Member
Messages
12
Reaction score
0
Points
1
Location
New Mexico
Just checked. On mine there are 4 slots to pry - all on the outer edge, not at the stem.

Pic is of the newer one with gray plastic body. You can see the pry at the junction of gray and black. https://www.amazon.com/Pfister-0X8-340A-Pressure-Universal-Fittings/dp/B000RP4Q76 (not notch in gray but in black piece)
Thanks for your response Stuff. Yes, if I had what the picture shows, I probably wouldn't even be posting this. Mine also is stamped "26732" on the body but the Adjustment ring is different. On mine, it's recessed about 1/2" back inside, and there are NO slots to pry from. There is only the tiny tang at 6:00.

See Figure 11 here:
https://pfisterstorage.blob.core.windows.net/documents/44353-0400 web.pdf
 

Stuff

Well-Known Member
Messages
1,221
Reaction score
130
Points
63
Location
Pennsylvania
Post a close up picture as all of the 0x8 valves should have the slots. In your figure 11C you can barely make out one slot but it is there. Fig 11D shows a couple in the threads but think one is drawn wrong as should have the last space colored in representing the adjustment ring.
 

TommyCee

New Member
Messages
12
Reaction score
0
Points
1
Location
New Mexico
Post a close up picture as all of the 0x8 valves should have the slots. In your figure 11C you can barely make out one slot but it is there. Fig 11D shows a couple in the threads but think one is drawn wrong as should have the last space colored in representing the adjustment ring.
No, I can assure you that there are no "slots". I met with a Pfister distributor yesterday who fully understood the problem I am describing and sympathized. He showed me a much newer version of the OX8 valve cartridge in which Pfister finally got a clue about the stubborn recessed Adjustment ring and moved it out flush with the end of the cartridge. That ring can be removed with great ease !! He suggested that I just cut out the ring and get the higher temp I desire with lower water flow by slightly tweaking the cold water stop adjacent to the valve body. This is the solution I am presently exploring.
 

Stuff

Well-Known Member
Messages
1,221
Reaction score
130
Points
63
Location
Pennsylvania
A picture would be nice as this is different than what most have.

Other option for you then is to close the stops, remove the four screws holding the plastic to the brass body, disassemble the valve, and push the stop limiter out from the other side.
 

TommyCee

New Member
Messages
12
Reaction score
0
Points
1
Location
New Mexico
Post a close up picture as all of the 0x8 valves should have the slots. In your figure 11C you can barely make out one slot but it is there. Fig 11D shows a couple in the threads but think one is drawn wrong as should have the last space colored in representing the adjustment ring.
No, I can assure you that there are no "slots". I met with a Pfister distributor yesterday who fully understood the problem I am describing and sympathized. He showed me a much newer version of the OX8 valve cartridge in which Pfister finally got a clue about the stubborn recessed Adjustment ring and moved it out flush with the end of the cartridge. That ring can be removed with great ease !! He suggested that I just cut out the ring and get the higher temp I desire with lower water flow by slightly tweaking the cold water stop adjacent to the valve body. This is the solution I am presently exploring.
A picture would be nice as this is different than what most have.

Other option for you then is to close the stops, remove the four screws holding the plastic to the brass body, disassemble the valve, and push the stop limiter out from the other side.

Your idea to remove the cartridge and try to push the ring out from the back side is exactly what the Pfister distributor suggested when I met with him. Not a bad idea. When now brings me to another issue:

When I try to turn the stop (12A) with a screw driver (see attached diagram), it's stubborn just like the Adjustment ring. Won't budge. Uggghhh !! Should I first loosen the brass hex that surrounds the screw?
 

Attachments

  • Pfister valve with stops.pdf
    42.9 KB · Views: 186

Stuff

Well-Known Member
Messages
1,221
Reaction score
130
Points
63
Location
Pennsylvania
I would still like to see a picture of what you have.

Those stops shouldn't require loosening but with your odd valve, who knows.
 

TommyCee

New Member
Messages
12
Reaction score
0
Points
1
Location
New Mexico
I would still like to see a picture of what you have.

Those stops shouldn't require loosening but with your odd valve, who knows.
Using a 12" crescent on my largest screw driver, I was finally able to get the stop valves to move! Both sides were set in the wide-open position. By closing the cold side about 30%, I finally managed to get a flow that reached optimum temp. with an ideal (modest) flow.

To indulge you request, I have taken pictures of the front of the cartridge (see attached). As I have explained, the impossible-to-remove Adjustment gear is recessed back inside the unit about 1/2". The single tiny plastic tang at 6:00 eventually did what was entirely predictable: it snapped off! This Pfister valve was very poorly designed by a fool who never had to work on them. Completely absurd. As I stated in this thread, the updated versions have the Adjustment gear located flush with the front of the cartridge, which it is extremely easy to remove. I saw one with my own 2 eyes.

I am fortunate to have the 2 stop valves that I could exploit to get the adjustment I needed.
 

Attachments

  • DSCF5519.JPG
    DSCF5519.JPG
    46.7 KB · Views: 185
  • DSCF5516.JPG
    DSCF5516.JPG
    49.2 KB · Views: 180
  • DSCF5517.JPG
    DSCF5517.JPG
    51.4 KB · Views: 183

Stuff

Well-Known Member
Messages
1,221
Reaction score
130
Points
63
Location
Pennsylvania
Thanks for the pics. I never saw one like that - maybe the first generation that didn't last? It looks like the black ring is not meant to be adjusted as the ribs are spaced too far apart. Normally it is like teeth from a gear. Any idea when yours was installed?

Hopefully the brass body is the same so you could swap the guts with Pfister's current valve if needed.
 

TommyCee

New Member
Messages
12
Reaction score
0
Points
1
Location
New Mexico
Thanks for the pics. I never saw one like that - maybe the first generation that didn't last? It looks like the black ring is not meant to be adjusted as the ribs are spaced too far apart. Normally it is like teeth from a gear. Any idea when yours was installed?

Hopefully the brass body is the same so you could swap the guts with Pfister's current valve if needed.

And sorry for the poor-quality pictures. It's a sick digicam.
It was probably installed 20-25 years ago. Just a guess. Markings on the ring suggest that it can be adjusted, thought I note that as configured, it is in the max. hot water position. Since this is consistent with the adjustment I sought, it's just as well that the tang snapped off. With the cold water side reduced about 50% (2 1/2 turns), I get a more optimum mix & flow. I now learned way more that I ever wanted to about this valve!:)
 
Top
Hey, wait a minute.

This is awkward, but...

It looks like you're using an ad blocker. We get it, but (1) terrylove.com can't live without ads, and (2) ad blockers can cause issues with videos and comments. If you'd like to support the site, please allow ads.

If any particular ad is your REASON for blocking ads, please let us know. We might be able to do something about it. Thanks.
I've Disabled AdBlock    No Thanks