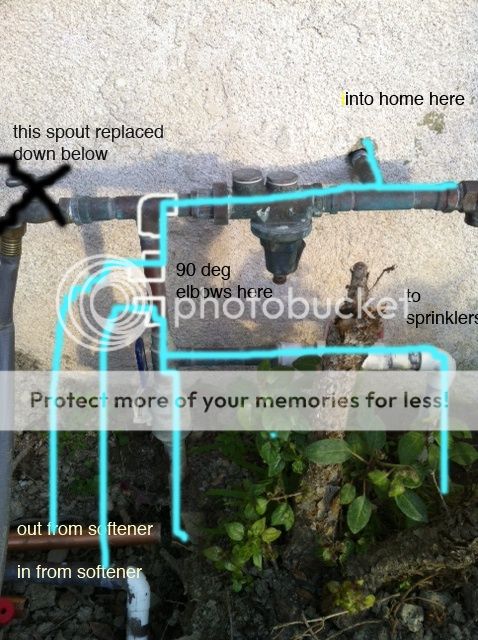
Marcello, you drew what I described, the only (hand operated shut off ) valve I mentioned is on the outlet of the softener, dittohead had added like a dozen valves here'n there. I see no reason for more than my one on the outlet and even then, it isn't needed, just nice to have IF your by pass valve can't shut off water to the house while you troubleshoot a problem with the softener. And that's only needed IF the people inside the house can't follow directions to NOT USE WATER until they are told it's OK.... Fleck by pass valves don't do that as far as I know.
Ok I see now I understand, I will certainly consider this.
The only thing with your drawing is, I suggested installing the softener to the right of the existing plumbing and you drew it to the left and down while out from the wall. That's not a problem though, you can run the plumbing anywhere you need it to go. If you don't bury the softener, your inlet will go over to the left or right and then UP a couple feet, and then the outlet down and over to the left or right to the house copper.
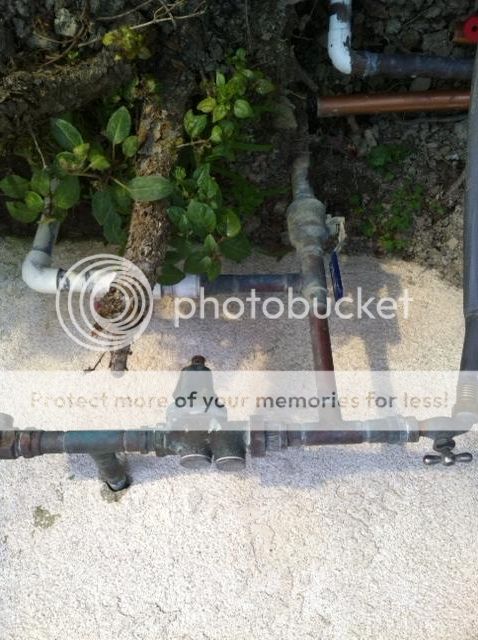
Mr Slusser unfortunately I can only come in off the left side where they are going to be stored and secured above ground safely there and there in/out lines soldered and ready to go.
if you've already bought the copper, then use it but any extra valves should be able to be returned with a receipt for a refund or store credit. Thinking about it, copper tubing and all fittings should be returnable as long as you didn't cut the tubing yet. PVC is much easier to work with and much less expensive. Plus it has a larger ID than the same size copper. And you could lightly sand it and paint it whatever color ya wanted to.
Yes, the copper fittings are nickels and dimes, alot of them and at 1'' for most they are adding up, and receipts are kept in safe place just in case.
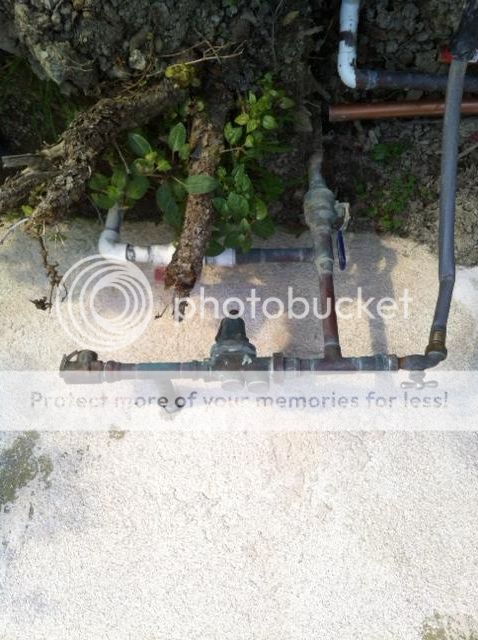
BTW, since dittohead's "professionals" here haven't asked yet, where are you planning to run the drain line? And what type material are you going to use?
I suggest a foot or two of 5/8" OD, 1/2" ID opaque PE tubing from the control valve to 3/4" PVC if you're going underground. It's nice to be able to see water flow or air bubbles in the drain line IF you have a problem with the softener.
I have a drain wash out that is out of that picture frame but has very easy access to tap in with a vent, I was planning on using all pvc but the idea of viewing bubbles would be great, WAIT , just so I know, hahahahah, bubbles mean problems? I guess ill deal with that when and if I get there.
I see you don't take the copper ground wire to the copper below the copper main line above or below the main brass shut off ball valve. That is where it has to/absolutely must go, not to a ground pin.