prpsrv
New Member
Hi All,
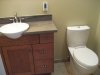
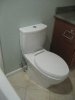
I am a general contractor who just installed two TOTO AQUIA Dual Flush toilets for a client. My first time so I read the posts on Terry's site. I am a picky guy so I read all directions thoroughly before starting. Follow the link below for photos I took of the process to help you out. A couple things I would like to reinforce from the previous posts:
1. You WILL need a 3/8" bit not a 5/16" as the TOTO install says. I tried the 5/16" and had to enlarge it.
2. You MUST install the toilet seat AND the supply line to the lower toilet bowl BEFORE you install or you will HAVE TO take it off and it is much easier to do without the tank installed.
If you use the supplied toggles for the seat, instead of the ones that come in the seat box, then you can install the seat last. (They will be made of black rubber and come with stainless bolts. They push into the holes from the top) The flexible water supply can be attached to the tank, and then the tank can be dropped onto the bowl. T Love
3. The reason I did so much layout prior to install was due to the fact that I had installed electric floor heaters under the tile and I had to be sure I wouldn't drill into it.
4. After the toilets were installed I still installed a "sanitary seal" around the base where it hits the tile (clear silicone caulking) as the bowl had a slight bit of movement. The Building Inspector noted I had installed the seal even though it was only decorative.
Some places require caulking around the front of the bowl, so water doesn't go under the bowl in front, and none in the back, so that if the wax seal leaks, you will notice and fix it sooner. The caulk also quiets the bowl to floor contact.
T Love
The client loves them!
Good luck and I hope my pictures help.
Neil
http://adobe.kodakgallery.com/I.jsp?c=kihl98n.90ptzblb&x=0&y=-7ki55s&localeid=en_US
Installation instructions for Aquia
Complete Instructions for the Aquia written by Jamie
Attachments

Last edited by a moderator: