Wall hung toilet

Users who are viewing this thread

ressler

New Member
Messages
2
Reaction score
0
Points
0
I have a '70s Kohler wall hung toilet (2 piece) in an upstairs bath. I am doing a partial remodel on the bath and need to remove only the tank. In looking inside the tank, I find 3 brass screws with rubber washers. I can only find 2 screws extending through the base with nuts on them. Where does the third one go? Is it in a blind nut inside the base? I haven't tried to take it apart for fear of really fouling it up but am going to need to do so, soon. I want to paint behind the tank.

 
Last edited by a moderator:

Peanut9199

Customer Service Manager Plumbing Wholesale
Messages
869
Reaction score
2
Points
0
Location
Ontario, Canada
The only Kohler toilet i could find was the "Wellesley" it's a square tank tappering smaller at the top.
I have the parts breakdown and it does show 3 bolts coming from the tank through a triangle flange and three nuts at the bottom of the bowl, but does not show all the connections in the picture.
If you unthread the bolts from the top it should loosen the bolts but again i'm not sure where the back one connectes to.
I tried on the internet to get a picture but it doesn't show. If you want i can fax you the breakdown.
 

hosea

New Member
Messages
11
Reaction score
0
Points
0
Third screw

I have probably the same toilet you have and took it off the wall a long time ago to do a project. The lower toilet has a recess beneath the tank for a screw. I will look at it again if you still have a question about it.
I started back on this project today.
 

ressler

New Member
Messages
2
Reaction score
0
Points
0
Hosea: Thanks for the reply. I still have the same question. I've contacted Kohler and have yet to get a real answer. They turned it over to their engineering group to see if they still have drawings of the unit. I can see the top of the third screw inside the tank but cannot find the other end of it on the bowl end anyplace. I've been over the whole unit with a flashlight and mirror to no avail (except the side against the wall). All I want to do is take the tank off for painting purposes and leave the bowl. Nothing is malfunctioning at this point so there is no other reason to remove it. If the nut on this third screw requires removing the whold unit, I'll just paint behind it with a skinny roller like the previous owner did. I'm just not in the habit of doing things that way.

I can't imagine any company making a plumbing fixture that needs to be torn apart completely because of one screw that needs to be removed. Anything you can shed light on is appreciated. Thanks again.
 

hosea

New Member
Messages
11
Reaction score
0
Points
0
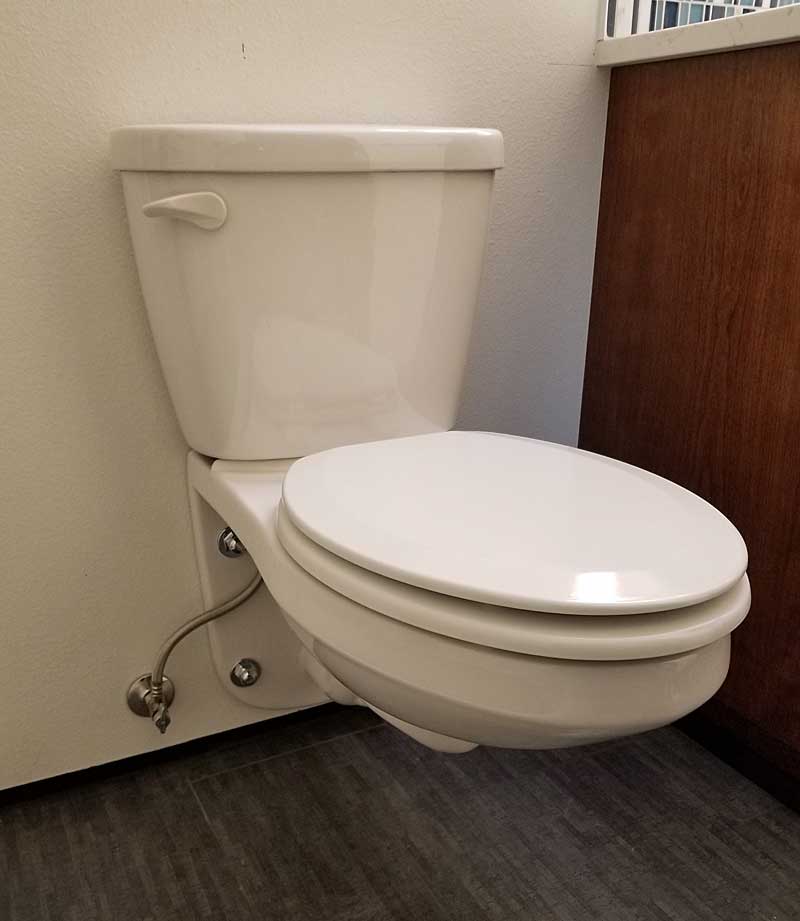
I think you have figured it out. I would highly recommend painting behind the tank and not removing it. The original plumber must have done a fantastic job. Mine used wax rings, which have started to leak, so I have a big project ahead of me.
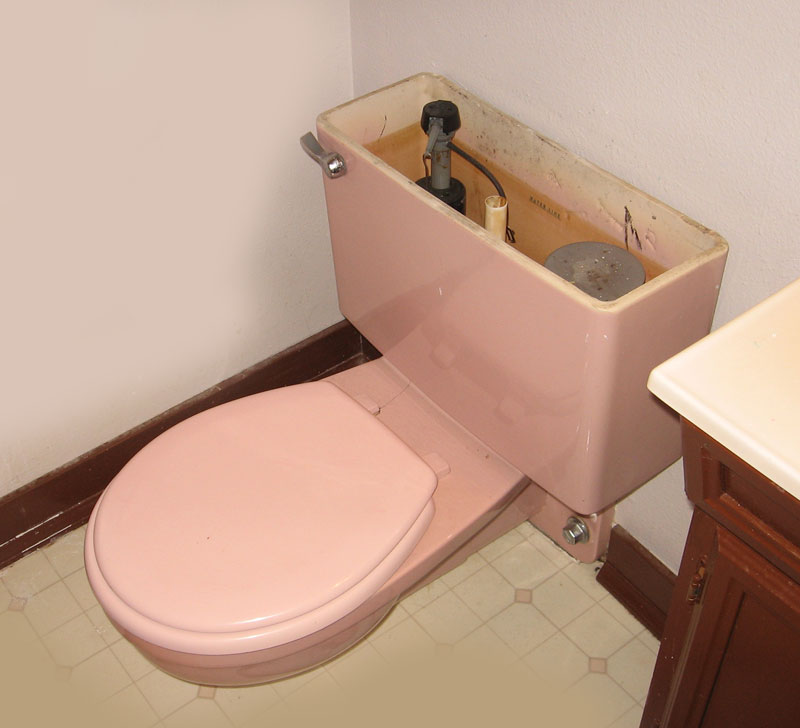
If you look down in your tank, you will see the two side screws towards the front of the tank and one screw that is centered and up towards the back of the tank. Mine is all apart and I have been cleaning and preparing it outside to be reinstalled. That center screw goes down into a threaded brass "nut". The nut is actually a pipe that has been cut in quarters on one end and flared to hold it against the top of the back of the bowl unit. When the tank is put on top of the bowl, this helps hold it in place. Not sure why they wanted this third screw. So I think you can take off just the tank by unscrewing that screw and the two sides ones to remove the tank. You will then probably need to get new rubber gaskets. If the tank is off too long, you may have trouble with gaskets drying out.
I hope this helps. I could try to send a photo, but I think you have a good idea of how it works. The part I could not remember is if there was a nut on the bottom of the center screw, which would be accessible only by removing the bowl and I don't think one is needed because the brass "nut" is threaded. Again, I would encourage you to paint behind the tank as best you can.
 

hosea

New Member
Messages
11
Reaction score
0
Points
0
I received a pdf file from Kohler today. I tried it as an attachment, but it is about twice the size allowed by this forum. The number is below. You could email Kohler and ask them for this file number: 114879_8.pdf. Or you could ask them for the diagram for K-3440-EB Elongated or K-3440-PT Round. The diagram shows all the parts and numbers. The page code at the bottom is: 114879-8-AA (9818). If you email me at hosea49@hotmail.com, I will send it directly to you. Hope all of this has been helpful.
 

Master Plumber Mark

Sensitivity trainer and plumber of mens souls
Messages
5,533
Reaction score
354
Points
83
Location
indianapolis indiana - land of the free, home of
Website
www.weilhammerplumbing.com
fools rush in where wise men dare to tread

Dont touch that Kohler toilet.....

leave it alone or you will be sorry....

that is like a land mine just waiting for the
first fool to step on it....to blow up in your face.

I would not even attempt to re-set that toilet
without expecting a disclaimor from the customer...

If you dont see a screw or nut leaving that tank
and you think you are going to somehow win
win against a 70s Kohler toilet
you are sadly mistaken.

that will probably cost you about a $600 to $900
to replace that toilet if you screw it up
 

Master Plumber Mark

Sensitivity trainer and plumber of mens souls
Messages
5,533
Reaction score
354
Points
83
Location
indianapolis indiana - land of the free, home of
Website
www.weilhammerplumbing.com
fear and loathing ....

whenever I see one of those toilets I get an
Anexiety attack....hair raises up on my back side..

Cant explain it... I just know that they are
trouble waiting to happen and I dont want
to be the guy that has to fork out 900+ bucks
for a new one to appease a customer....

recently had a PINK one that I walked away from...

break a pink one and see how much that might cost you

if you touch it and it breaks,
generally that means you have bought it....


some things are just best left alone...

especially when you have many other things to do
that involve less risk......

wall_hung_pink.jpg
 
Last edited by a moderator:

hosea

New Member
Messages
11
Reaction score
0
Points
0
Have you ever seen a link with directions for installing one of these? I posted another thread on how to do this, especially the use of the "saver nut", but have had no positive replies. Kohler had the diagram, but no directions. I don't have a choice as I have had mine off the wall for a couple of years and have finally finished the tile work and need to rebuild the inside and remount it on the wall. My wife asked again today when this was going to be finished. She is very patient! From what I understand, the bowl will not mount flush with all four nuts and that is why the "saver nut" on the fourth bolt is used. Kind of the same reason milk stools have only three legs.
 

hj

Master Plumber
Messages
33,599
Reaction score
1,037
Points
113
Location
Cave Creek, Arizona
Website
www.terrylove.com
bolt

Unscrew the bolt from its recess. The tank was installed after the toilet was installed and comes off the same way.

maxwell_wh_04.jpg
 
Last edited by a moderator:
Top
Hey, wait a minute.

This is awkward, but...

It looks like you're using an ad blocker. We get it, but (1) terrylove.com can't live without ads, and (2) ad blockers can cause issues with videos and comments. If you'd like to support the site, please allow ads.

If any particular ad is your REASON for blocking ads, please let us know. We might be able to do something about it. Thanks.
I've Disabled AdBlock    No Thanks