Would like to replace indexing valve

Users who are viewing this thread

nabril

New Member
Messages
4
Reaction score
1
Points
3
Location
Miami, FL
My current set up is: an intermatic mechanical timer that controls a well-water pump, and it feeds and a K-Rain 4000 (or similar) indexing valve. The timer and the valve are within 4 feet of each other. I also have a rain sensor. The indexing valve rarely changes zones despite me replacing the interior disk twice; I'm tired of having to take it apart.

I would like to replace that valve with 2 inline or other type of valve that I can activate separately. My current setup has a zone with rotors, and the second with the sprinkler heads that water my wife's orchids; I want to be able to simply activate one of my 2 zones independently, for example.
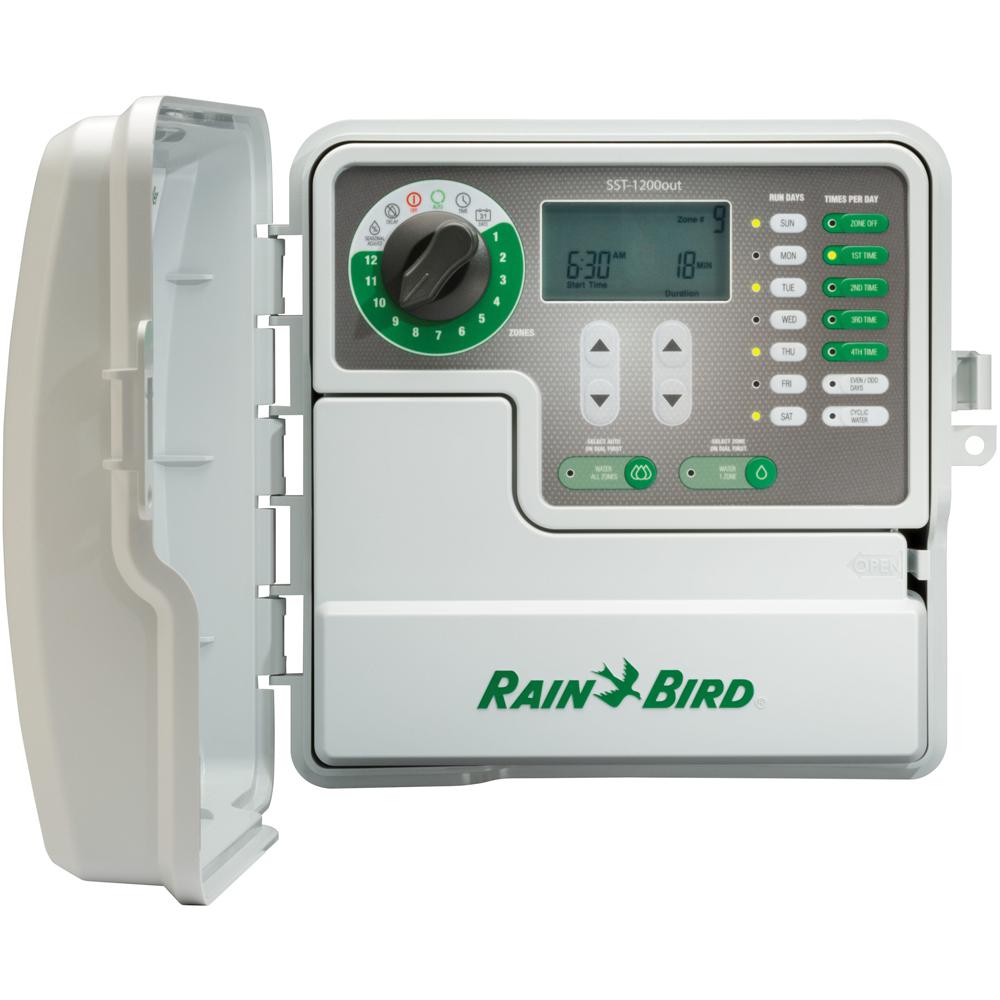
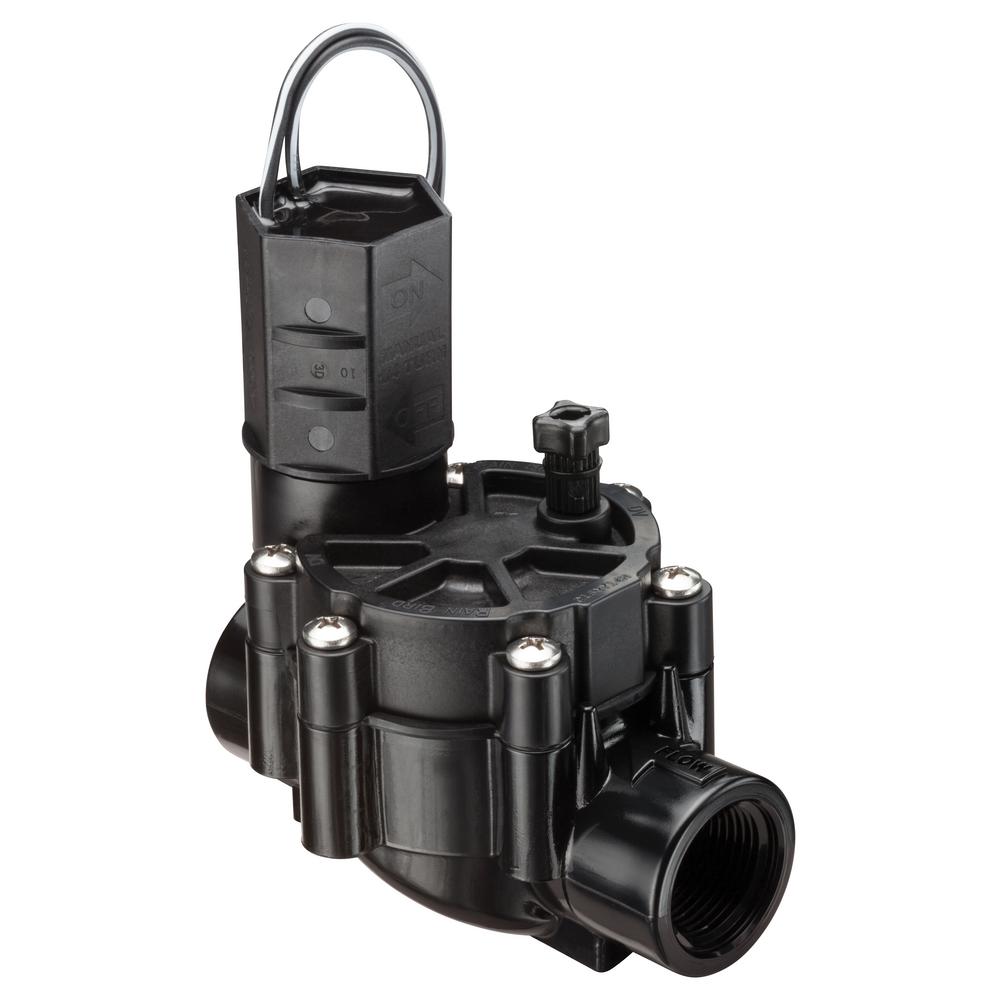
After some research, I've learned that I need a new controller, and some type of valves, 2 of them for my 2 zones.

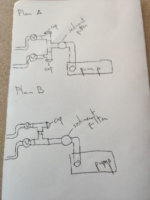
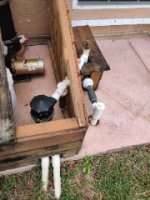
Do my drawings make sense? Should I bury the valves in a box? I don't have freezing concerns here in Miami.
THanks
 

Attachments

  • IMG drawing.png
    IMG drawing.png
    128.8 KB · Views: 345
  • IMG now.png
    IMG now.png
    123.3 KB · Views: 330
Last edited:

WorthFlorida

Clinical Trail on a Cancer Drug Started 1/31/24. ☹
Messages
5,754
Solutions
1
Reaction score
994
Points
113
Location
Orlando, Florida
Since controllers have become less costly, easier to program and valves also are less costly than twenty years ago, indexing valves are only used for replacements.

You'll need a new controller, motor start relay, and in line valves. You can place the valves almost anywhere and they do not need to be inside a box nor underground. You also well need to remove intermatic timer.

For residential use about the smallest controller is for four or six zones, depending of brand with some are expandable with modules. WiFi units are now available so you'll need to do a little research on your needs but most all can activate one zone at a time manually. If you know electricity, rewiring the pump to the motor start relay will be more complicated part if you never did it before. Your pump could be 110v or 22v volt and the wiring it will be different but all motor start relays are the same for 220v or 120v operation. Your current setup does not use a pump start relay.
The controller (outdoor type) needs to be hard wired to 120v, usually where the intermatic timer was. If it is inside a garage it can be plugged in, all depends on the model. Irrigation valves can be bought separately in a two or three manifold configuration.

This is all doable by a DIY'er and it will take you a whole day if it is the first time. My only concern is the electric if you are comfortable with it.

Second page of installation has the line voltage wiring.
https://www.rainbird.com/media/4452

This is the low voltage side
https://sunshoweronline.com.au/how-to-wire-solenoid-valves-to-an-irrigation-controller

For residential use, reliability and ease of use, cost wise I find Rain Bird to be the best offer.
https://www.rainbird.com/homeowners/products/timers-controllers/support
whites-rain-bird-irrigation-controllers-sst600o-c3_145.jpg
rain-bird-sprinkler-valves-cp075-c3_145.jpg
orbit-sprinkler-manifolds-57250-1f_145.jpg
irrigation-repair-accessories-57009-40_145.jpg
 
Last edited:
Top
Hey, wait a minute.

This is awkward, but...

It looks like you're using an ad blocker. We get it, but (1) terrylove.com can't live without ads, and (2) ad blockers can cause issues with videos and comments. If you'd like to support the site, please allow ads.

If any particular ad is your REASON for blocking ads, please let us know. We might be able to do something about it. Thanks.
I've Disabled AdBlock    No Thanks