WJcandee
Wise One
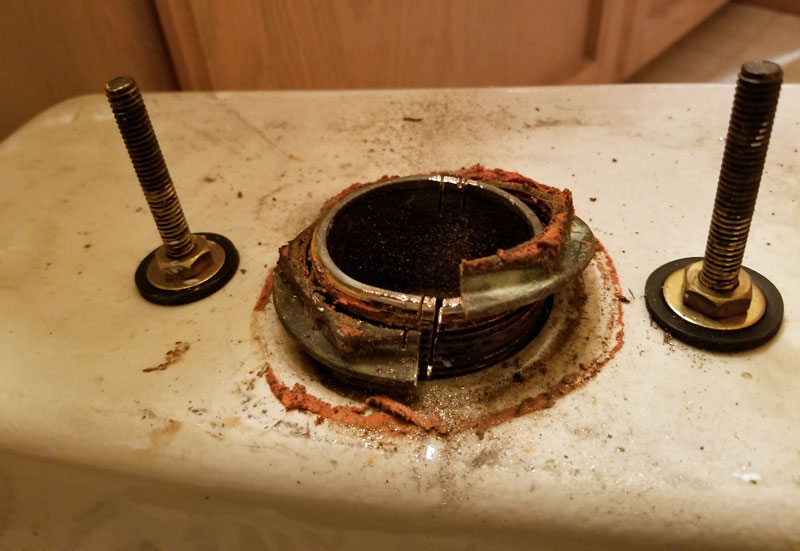
I was replacing the fill valve and flush valve in a 1955-manufactured (and likely 1955-installed) AS toilet that gets little use but needed an overhaul. All the internal parts are heavy-gauge metal. Got the tank off and fill valve out; bit of a struggle but ultimately no problem. However, when I pulled the sponge gasket off the flush valve mounting nut, I got a nasty surprise. The metal mounting nut was either attached to or behind a metal washer-like thing, round and thin. Oddly, it looked like maybe it was supposed to press against the the chipboard gasket but instead got installed upside down? In any event, it is round and blocked my ability just to put my channel-locks on the nut and twist. So I put them on the round thing, thinking I could just twist it off. Bits of it chipped off as my channel-locks bit into it, so I can get some traction. But as to spinning the washer and/or nut off, no go. Even with my full body weight on it, it just wouldn't budge. Finally, all I managed to do was twist the whole flush assembly in the hole, which now doesn't move at all. I don't want to crack the tank, so I am wondering...
Have I encountered some tricky thing that non-pros like me don't know about? Reverse threading? (I am turning counterclockwise.) Does my description make sense? (I have a couple of photos...)
Assuming this is just a nut, is there a preferred procedure at this point? Hit it with a propane torch and then try twisting again? Use my Dremel tool to try to cut away the nut? Separate the round thing from the nut? Cut the whole heavy-freaking-metal-threaded flush valve stem? I don't think I can get a hacksaw in there at the bottom of the tank, through.
Thank you in advance for your suggestions. It really is the case that the biggest unknown in old-house DIY is what you are going to find when you pull off the old thing, and I am having all sorts of new experiences with each project I try! (Which is cool, because you gain experience by having new experiences, but this one has me stumped and exhausted...)