Garbage disposal in single bowl sink - too close to drain line

Users who are viewing this thread

CodeMaster

New Member
Messages
4
Reaction score
0
Points
1
Location
Florida-USA
Hi there,

This is my first post here and I'm hopping someone can help me figure this out (I'm loosing sleep over it for 3 days already :confused: )

I replaced my sink as part of a kitchen remodel.
I Went from a shallow double bowl sink to a single bowl 10 inches deep.
To make matters worse, instead of being in the center, the basket is placed towards the back of the sink.

Why I did that? Simple: the guy at the store (selling the cabinets) told me to just "choose a sink" so why not get the nicest one? :mad:

Anyway, now I'm faced with 2 problems:

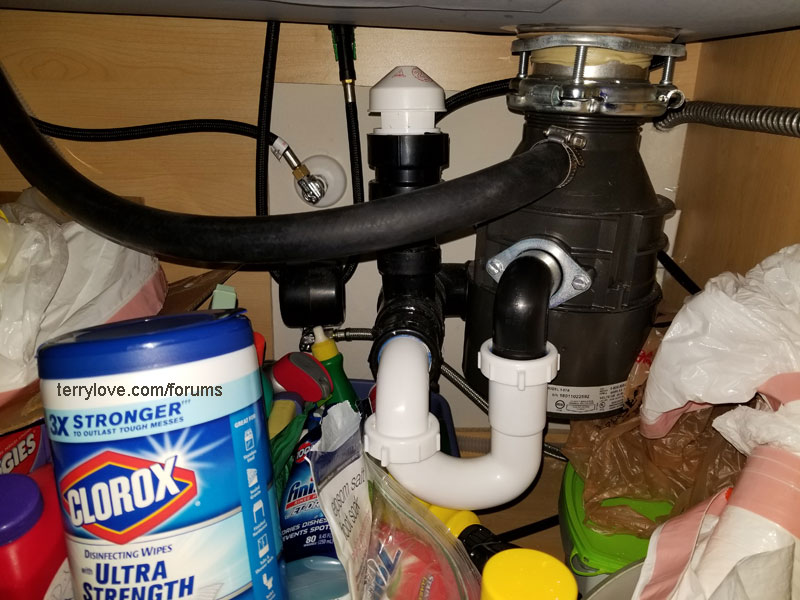
1- Garbage disposal is too close to drain line so it cannot come out of the wall straight.
2- Garbage disposal is "almost too low".

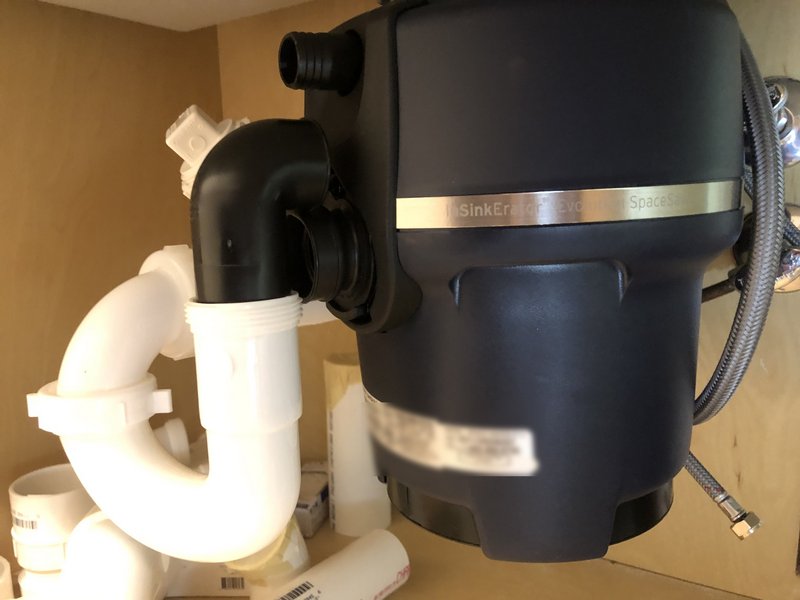
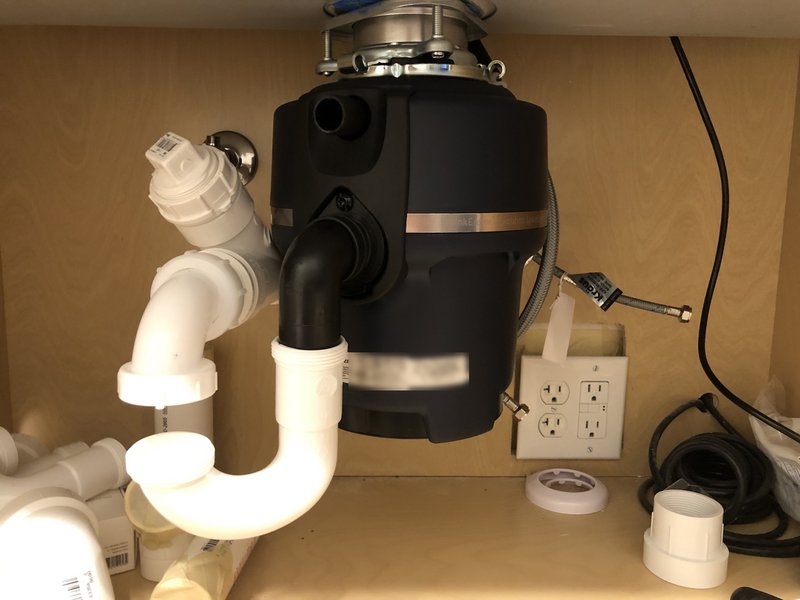
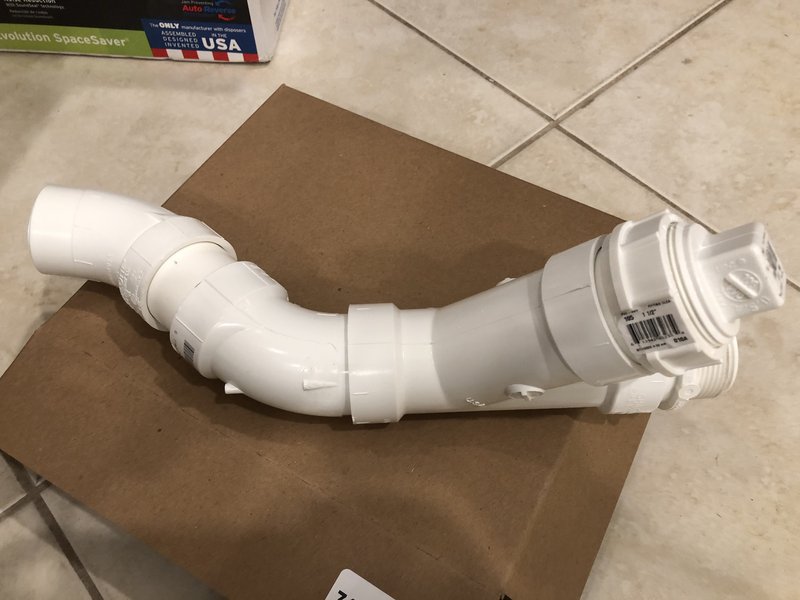
I came out with a few solutions that you can see in the picture.
Nothing is glued or installed in there, even garbage disposal is just hanging so it may go up 1/4 " after properly installed.

These are the things that are bothering me:

1) As far as height goes, if you consider gravity I don't think it is going to be a problem, is it?
The bottom of the disposal outlet is a little bit higher than the bottom of the drain pipe so... should I be concerned it won't drain?

2) Is it ok to add a 2" to 1-1/2" reducer right there in the wall (where there is a tee) or do I have to come out with 2" and somehow reduce it after the cleanout, as it was before when there was plenty of space?

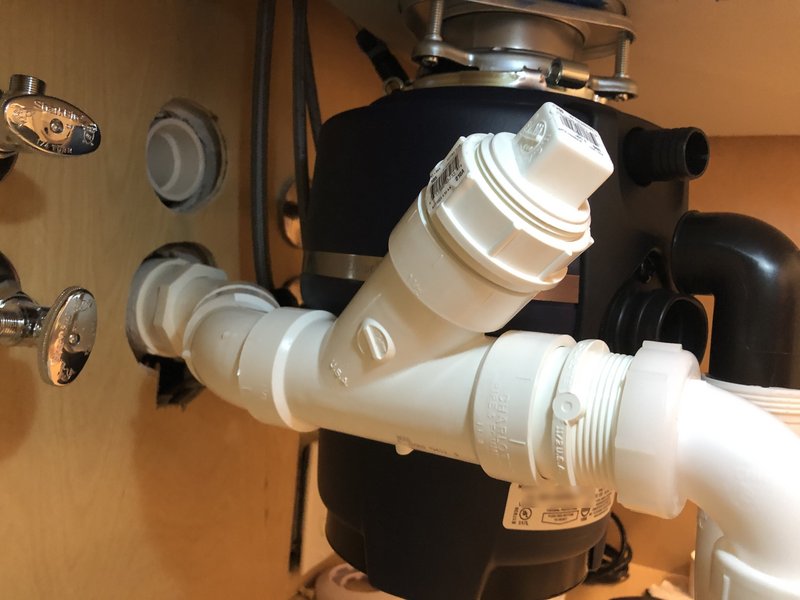
3) The drain line cannot come straight from the wall. Is that curve ok (see pics)?

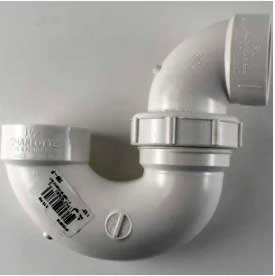
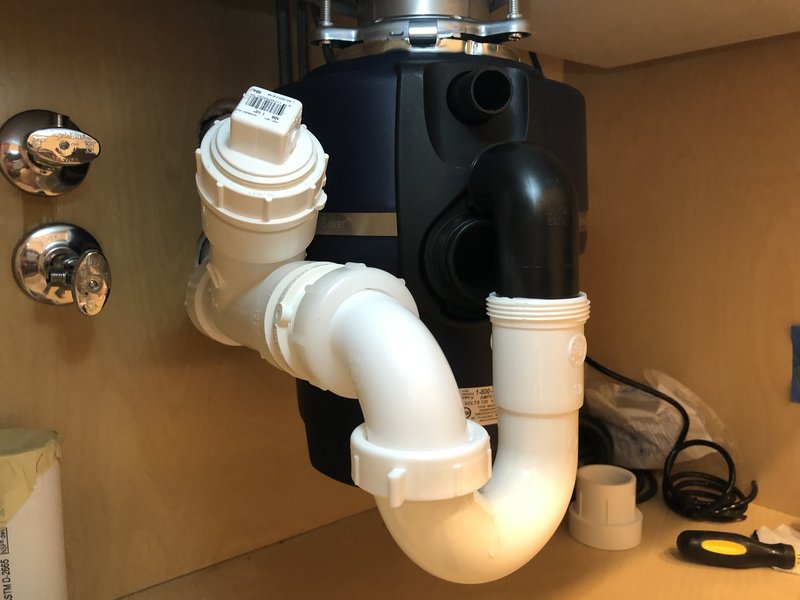
4) As for the ptrap, as you can see in the pics, the only way I can make it work is by bringing it down about one inch. I know this is not how it is intended to work be but will it cause me any problems?

5) Final question: do you see anything that could be considered a code violation?

Trying to consider my options before I have to call someone to start breaking things.

IMG-5753.jpg


IMG-5770.jpg


IMG-5771.jpg


IMG-5773.jpg


IMG-5783.jpg


IMG-5784.jpg


Thanks in advance.
 

Terry

The Plumbing Wizard
Staff member
Messages
29,942
Reaction score
3,459
Points
113
Location
Bothell, Washington
Website
terrylove.com
I think either a glue-up trap there with a spigot trap adapter or a reverse trap to get you low enough for the final connection.
 

Reach4

Well-Known Member
Messages
38,881
Reaction score
4,433
Points
113
Location
IL
You may already have a reversible trap. Turn the U around, and see what that looks like.

You may need to put a 45 or even a 60 at the wall to jog around your disposal.
p320-015-1.jpg
p323-015-1.jpg


Don't try to glue more than you have to. Go to slip joint close to the wall. Maybe one street 45 or 60 with a spigot trap adapter in it. Then slip joint the rest. Makes adjusting stuff easier.
 
Last edited:

CodeMaster

New Member
Messages
4
Reaction score
0
Points
1
Location
Florida-USA
I think either a glue-up trap there with a spigot trap adapter or a reverse trap to get you low enough for the final connection.

Now that you mentioned it, it is a reverse trap.
I tried reversing it but couldn't figure it out how it works when installed backwards.

If the higher side of it (originally the inlet) goes towards the drain, then the lower side will be right under the disposal outlet however, the disposal outlet won't go inside the trap since that side is not meant for that, how are they supposed to be connected?

On the other hand I'm confused with the concept of reverse trap since I heard having the trap backwards is a bad thing.

You may need to put a 45 or even a 60 at the wall to jog around your disposal.
Don't try to glue more than you have to. Go to slip joint close to the wall. Maybe one street 45 or 60 with a spigot trap adapter in it. Then slip joint the rest. Makes adjusting stuff easier.

That is exactly kind of what I have going around the disposal (see last picture).
Two 45s against each other and a wye so I can have a cleanout plug. The wye is the biggest issue due to its size and I needed a small piece of pipe between the elbows to extend it just enough to go around. Doesn't look like I can get away without gluing the whole thing.
 

Reach4

Well-Known Member
Messages
38,881
Reaction score
4,433
Points
113
Location
IL
Now that you mentioned it, it is a reverse trap.
I tried reversing it but couldn't figure it out how it works when installed backwards.

If the higher side of it (originally the inlet) goes towards the drain, then the lower side will be right under the disposal outlet however, the disposal outlet won't go inside the trap since that side is not meant for that, how are they supposed to be connected?

On the other hand I'm confused with the concept of reverse trap since I heard having the trap backwards is a bad thing.
https://terrylove.com/forums/index....-be-installed-backwards-j-bend-lo-inlet.30064

That is exactly kind of what I have going around the disposal (see last picture).
Two 45s against each other and a wye so I can have a cleanout plug. The wye is the biggest issue due to its size and I needed a small piece of pipe between the elbows to extend it just enough to go around. Doesn't look like I can get away without gluing the whole thing.
With a slip joint trap, you can remove the stuff back to the trap adapter, and rod thru the trap adapter.

In retrospect, you could have gotten a sink with an off-center drain.

Also, if you did have a wye for cleanout, the wye could be rotated some CCW if that improved clearances. But I don't think you will need the wye with the slip joint pipes.

If that lower left stop valve is in the way, maybe you could do something about that. Are those compression stops on copper stubs, or what?

reverse-p-trap-install.jpg
 
Last edited by a moderator:

CodeMaster

New Member
Messages
4
Reaction score
0
Points
1
Location
Florida-USA
To be honest, the first thing I considered when I realize I had this issue was a sink with an off center drain but believe it or not, I couldn't find one with the exact same dimensions.

I did have a wye for cleanout before and that is the reason I'm adding one back, I believe it is a requirement where I live (Florida).
And yes, those are compression stops on copper stubs and I'm trying to leave some clearance in there is you noticed so I can service them when needed.
 

PlumbNuts

SC Licensed Plumbing Contractor
Messages
251
Reaction score
83
Points
28
Location
Fort Mill,SC
Website
riverviewplumbingrepair.com
Before going any further connect the disposer to the sink and tighten it so that it is in it's final position.
Now measure from the bottom of the cabinet to the centerline of the outlet of the disposer and measure from the bottom of the cabinet to the centerline of the drainage Tee that is coming through the back of the cabinet.
From what I can see on the pictures they both appear to be at the same level, if this is the case then your disposer will always be holding water and you will have nothing but problems in the future.
If you really love the sink and the disposer you may have to open the wall and lower the drain;
If you really love the sink but not the disposer then solution is simple.
If you don't love the sink enough to open the wall then you will need a more shallow sink.
 

Reach4

Well-Known Member
Messages
38,881
Reaction score
4,433
Points
113
Location
IL
I did have a wye for cleanout before and that is the reason I'm adding one back, I believe it is a requirement where I live (Florida).
You have a cleanout on the wall above the drain, right?

Also, slip joint trap stuff makes it easy to clean.

Would that be Tampa? AFAIK, all of Florida uses IPC, but there could be local amendments.
 

CodeMaster

New Member
Messages
4
Reaction score
0
Points
1
Location
Florida-USA
From what I can see on the pictures they both appear to be at the same level

Center to center, the disposal is bout 1" higher than the drain line.

You have a cleanout on the wall above the drain, right? ... Would that be Tampa? AFAIK, all of Florida uses IPC, but there could be local amendments.

I'm in south Florida, I believe they do have local amendments here.
The opening above the drain is for the mini vent valve.

Another fun fact: I considered opening the wall from the other side to lower the drain (since it is an island).
But before I did it I noticed one of those copper lines (the one from the lower right) is crossing right in front of the vertical pipe so to lower the drain I would have to cut the copper line which add a lot of complications to it, more than I can handle at least o_O

Looks like I have very limited options here.
But thanks a lot guys, I guess a have some hard decisions to make today.
 

PlumbNuts

SC Licensed Plumbing Contractor
Messages
251
Reaction score
83
Points
28
Location
Fort Mill,SC
Website
riverviewplumbingrepair.com
Have you considered opening the wall from the cabinet side (since you would have two holes to patch anyway) and possibly offsetting the drain while lowering it?
You can stub out low and offset with one stub out then add your AAV vent tee and end up with the sink that you are obviously wanting (I mean it is the one that YOU picked out).
 

Terry

The Plumbing Wizard
Staff member
Messages
29,942
Reaction score
3,459
Points
113
Location
Bothell, Washington
Website
terrylove.com
I saw this one on a new home. Not really planned out well.

kitchen-sink-rough-aav-02.jpg


A very deep sink, and the drain in the wall behind the disposer.
The 7/8" hose from the air-gap has a big loop in it.
 

WorthFlorida

Clinical Trail on a Cancer Drug Started 1/31/24. ☹
Messages
5,760
Solutions
1
Reaction score
997
Points
113
Location
Orlando, Florida
The disposal elbow pipe can be cut and inch or two and still have enough pipe for the slip nut to grab. If you mess up these are sold in stores.
Lowes shows this as store stock. Along with cutting the disposal pipe, and this short trap it might just work. Better than opening walls.

swivel-trap.jpg


My home in Palm Beach County and here in Orange county, a cleanouts were never installed by the home builder. With slip joint p traps it is really not needed. If the sink is on an exterior wall, then you'll see a clean out on the outside wall. When I had my kitchen remodeled, I did the plumbing and got wise and lowered the wall connection, perhaps a little too low but using a simple tailpiece extension took care of it. My setup is identical to yours.

58666FD3-9DDE-4C47-9058-310738BF4CC9_1_105_c.jpeg 7EEDF01E-1843-4101-9557-4965404C7A58_1_105_c.jpeg
 
Last edited by a moderator:
Top
Hey, wait a minute.

This is awkward, but...

It looks like you're using an ad blocker. We get it, but (1) terrylove.com can't live without ads, and (2) ad blockers can cause issues with videos and comments. If you'd like to support the site, please allow ads.

If any particular ad is your REASON for blocking ads, please let us know. We might be able to do something about it. Thanks.
I've Disabled AdBlock    No Thanks