Hi all!
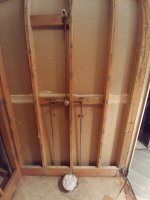
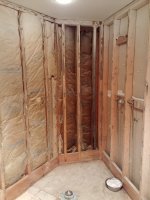
Hoping to get advice on how I should run this setup. Mostly getting confused on the valve choices.. The shower is currently opened to the studs and we wanted to take this opportunity to add a rainfall shower head in the ceiling. Its a shower only and currently plumbed for a single 45° shower from the wall. While adding this rainfall showerhead we were hoping to not lose water pressure, and having both at the same temperature would be a bonus, bus not at the expense of water pressure. 1/2 inch lines. Planning on moving the current light and installing it there, directly above the drain. Finish will be brushed nickel fwiw.
My plumber mentioned using Delta 1700 series? Not finding much on it
Any recommendations on valves, plumbing route, fixtures etc greatly appreciated. Im a newb, but you all helped me through my single to dual sink vanity project in this same bathroom.