1947 Cape Cod Attic Insulation Advice Needed

Users who are viewing this thread

Lordoftheflies

Active Member
Messages
368
Reaction score
32
Points
28
Location
NY
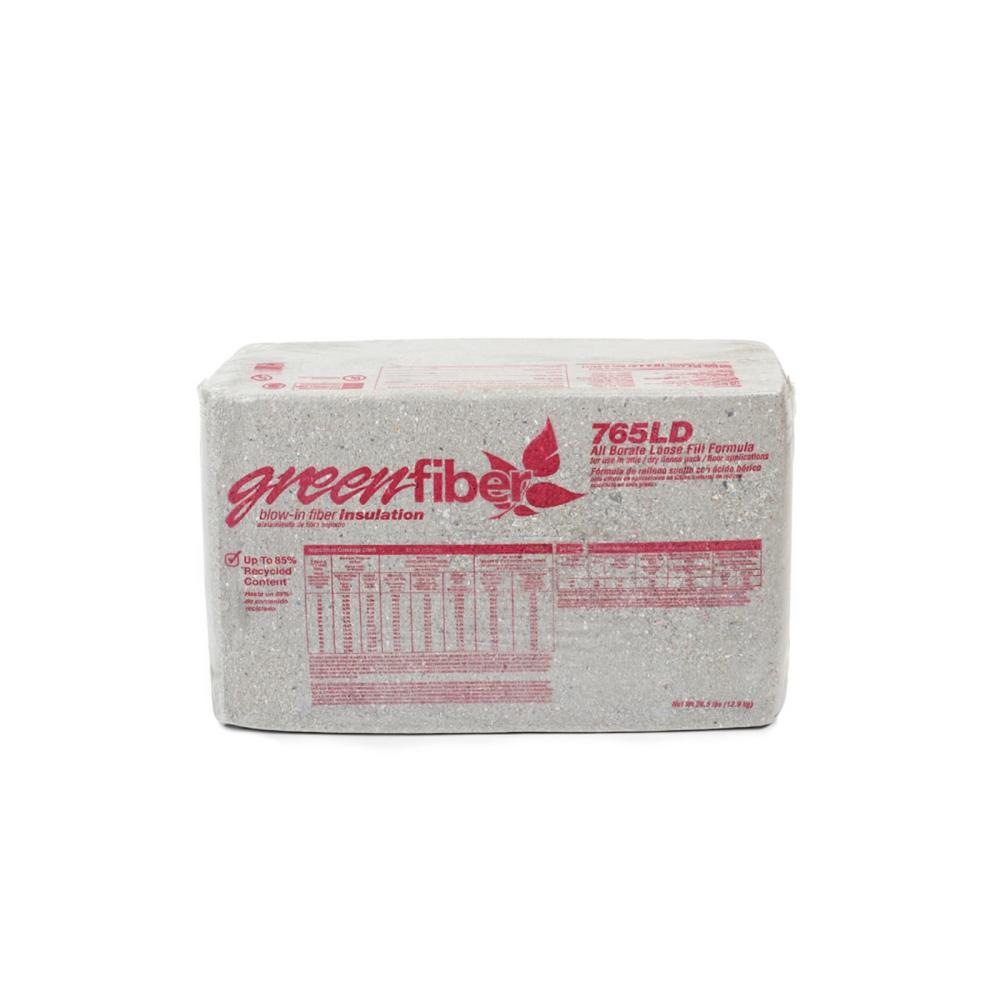
@Dana what do you think of this video? I watched quite a few of his videos and I like what he says. Looks like he's insulating those angled parts between the crawl space and the mini attic with blown in cellulose. Someone mentioned that home depot rents out the machine if you buy enough blown in insulation. I think this might be more cost effective in terms of effort. Dragging fiberglass batts up there and cutting it up and measuring sounds real tiresome. :D


WorthFlorida

Clinical Trail on a Cancer Drug Started 1/31/24. ☹
Messages
5,763
Solutions
1
Reaction score
998
Points
113
Location
Orlando, Florida
The screw spacing of 12” is the minimum, more screws won’t hurt. BTW... if you have a permit and inspection coming, usually the local authority require 5/8” drywall for ceilings. If it becomes a problem, another 1/2” over it would work.

Another hint, when you need to cut drywall, try to put the cut edge along the wall and the factory tapered end butt up against the other tapered end. Not always possible but it makes the taping much easier for a smooth joint.
 

Dana

In the trades
Messages
7,889
Reaction score
509
Points
113
Location
01609
@Dana what do you think of this video? I watched quite a few of his videos and I like what he says. Looks like he's insulating those angled parts between the crawl space and the mini attic with blown in cellulose. Someone mentioned that home depot rents out the machine if you buy enough blown in insulation. I think this might be more cost effective in terms of effort. Dragging fiberglass batts up there and cutting it up and measuring sounds real tiresome. :D

You'll note in response #12 of your thread I was recommending blowing some cellulose in there rather than going batty at it. Blowing insulation is easier by far if you have somebody to keep loading the hopper on the blowing machine. They didn't show it in the video, but raking the cellulose flat & level is important.

But insulating the sloped ceiling portion (as shown in the video) with cellulose is risky unless there is a continuous vent path to the mini-attic up top. The 1" gap prescribed in code presumes soffit vents. With no vents letting outdoor air in from below it needs to be at least twice that. If you're insulating at the roof deck plane in the kneewall attic space (as they did in video) that too needs a continuous air gap all the way up to the mini-attic up top.

On roof pitches that get good sun the moisture risks of an UNvented cellulose filled rafter bay is still pretty low, as long as the vapor permeance of the cathedral ceiling portion isn't too tight (not lower than 0.5 US perms.) They ended up using foil faced foam, which increases the risk. The vapor permeance of a foil facer is under 0.05 perms, and order of magnitude too vapor tight. They also didn't even tape the seams of the foam board, creating an air leak path for moisture transport from the conditioned space interior into the cellulose layer.

What they did in the video it technically a code violation, and it's a stackup that comes with some risk. The vapor permeance of a shingles + roofing felt layup is about 0.1- 0.15 perms. While it can theoretically dry (ultra slowly) to the exterior, there is ZERO drying of the roof deck toward the exterior when the shingles are covered with snow, wetted with rain, or even wetted with dew, common in the morning hours during the sticky summer season. With foil facers vapor barriers on the interior it's a moisture trap- moisture that gets into the roof deck & cellulose never leaves, and even a tiny roof leak can end up saturating a large section of cellulose over time.

If you're willing to take some risk but without the moisture trap, rather than a continuous foam board layer on the under side of the rafters, install some "Bonfiglioli Strips" to the bottom edges of the rafters to get more depth, then install half-inch wallboard for a ceiling, and paint the gypsum board with "vapor barrier latex" primer to bring it's vapor permeance down to 0.5-1 perms. That is a sufficient drying path toward the interior such that between the moisture buffering capacity of the cellulose and drying toward the interior, the sun will bake out seasonal moisture accumulations without the moisture content reaching rot levels in the roof deck or damaging the cellulose.

Another unvented approach would be to apply 1" of closed cell polyurethane spray foam to the underside of the roof deck before applying the cellulose, which is enough to be able to use standard latex paint (3-5 perms) on the ceiling gypsum.

More on unvented roof assemblies here. Skip ahead to Table 3 on the top of page 11. You are in climate zone 4A, comparable to the Kansas City or Boston examples. These simulations are for the moisture content of north facing roof pitches that get less help from the sun. Note that cellulose-only (in the second column) is inviting disaster despite the seasonal moisture buffering capacity of cellulose, but if you move over a few columns to the right under "1" ccSPF + spray fiberglass" the roof deck is completely safe, except under a light metal roof.

As long as you avoid the moisture trap of foil-faced foam and install only air-tight painted gypsum board on the interior side you'll be just fine with a skinny-inch of fully adhered closed cell spray foam on the underside of the roof deck, even on north facing pitches.

Read more commentary on unvented insulated roofs on this bit o' bloggery. The upshot is that it has to be VERY air tight to the interior to have a shot at surviving over the long haul if there is no vent space under the roof deck. I would expect it to be VERY hard to make the kneewall attic truly air tight without using expensive spray foam.
 
Last edited:

Lordoftheflies

Active Member
Messages
368
Reaction score
32
Points
28
Location
NY
I have a gap using raft-r-vents from the crawl space up to the mini attic.

I think the plan could be to install something like this here foil faced 3/4" foam board. One side has foil, the other does not. For the portion attached to the roof, it kind of makes sense to me to have the foil facing the outside in order to reflect the radiant heat in the summer. On the inside walls, I could see the logic to have the foil facing the inside to reflect the heat trying to escape the room in the winter.

What do you think? Those are $16 a 4x8 sheet.

https://www.lowes.com/pd/Johns-Manv...olyisocyanurate-Foam-Board-Insulation/3851105

By my calculations I'm going to need (20) 4' x 8' which should cover both the angled part (rafters) and the inside wall of the crawl spaces.

For the mini attic I think I could lay the cheapest foam board (thinking 1/4" pink stuff from box store) where the rafters meet the joists so that the blown in insulation doesn't hit the roof. If I make those boards say 24" wide then that should suffice in providing an air gap for the roof to breathe.

Going up to the attic today to start vacuuming and sealing whatever openings I can see. I also need to install my recessed housings. I'm going to go with 6" lights (I have some spares) since I can't seem to find any 4" remodel IC housings and don't feel like hassling with the rockwool hats.


Lordoftheflies

Active Member
Messages
368
Reaction score
32
Points
28
Location
NY
Took some pics of the crawl spaces so you can see what the old contractor did (incorrectly I might add with the facing pointed the wrong way on the inside walls).

There is some insulation in the floor. In order to prevent air from blowing in between the floor joists I'm going to have to rip up the subfloor they installed.

Here's the 7" round vent for the kitchen exhaust. All that junk we haven't touched in 5+ years. In the garbage it goes.

2019-07-13 12.46.51.jpg


Nice loose fitting fiberglass batts in the floor here.

2019-07-13 12.49.41.jpg


Here you can see the bathtub.

2019-07-13 12.49.45.jpg
2019-07-13 12.49.50.jpg
2019-07-13 12.49.56.jpg


Since they used r-19 on the 2x4 wall it's not really an efficient install. I'm going to have to get some R-13 faced and have the facing on the inside, then seal up with foam.

2019-07-13 12.54.52.jpg
 

Lordoftheflies

Active Member
Messages
368
Reaction score
32
Points
28
Location
NY
I'm confused about their description of the foam board though:

  • One side has a reflective foil face typically installed toward the warm air surface to reflect energy back toward the dwelling and the other side has a white non-reflective foil face typically installed toward the interior
I mean.....doesn't that imply that both methods point towards the interior??
 

Lordoftheflies

Active Member
Messages
368
Reaction score
32
Points
28
Location
NY
If you have to insulate a triangular attic that is too small to crawl into, it may be necessary to fill the space with dense-packed cellulose. Because this technique doesn’t allow for roof ventilation, it is somewhat controversial. Nevertheless, this approach has been used successfully for years by weatherization contractors in New England. According to Bill Hulstrunk, technical manager at National Fiber, “We do it only if the area is so small that we can’t get a body in there. In other words, the kneewall has to be 18-in. high or less. The first time the tube is inserted, it sits on the bottom of the floor. Then after a while, you pull out the tube and reinsert it higher up to top everything off.”

Hm..........
 

Lordoftheflies

Active Member
Messages
368
Reaction score
32
Points
28
Location
NY
I do get a lot of direct sunlight on the southside and at this point I think I need to move a bit forward. Winter is a coming.
 

Lordoftheflies

Active Member
Messages
368
Reaction score
32
Points
28
Location
NY
Seems like if I put the foam boards on the knee wall I'd be trying to do both methods. I think I will just put the foam boards on the roof side of the crawl space, then rip out the insulation that was installed incorrectly on the knee walls, rip up the floor boards so I can install blocking on the floor joists of the knee wall (fun times ahead) and go ahead with my plan to blow in cellulose in the attic above the living space. I'll go up again to see if I can fit some raft-r-vents in the sloped sections but otherwise, I might just fill with cellulose and pray.
 

Lordoftheflies

Active Member
Messages
368
Reaction score
32
Points
28
Location
NY
14 boards of 3/4" Johns Manville foil faced R4.4 Polyisocyanurate foam panels (4'x8'). I'll probably have to slice them up pretty small to fit into the damn crawl space opening. I don't see a way around that!

I ended up getting (50) of those 14" plastic rafter vent panels. I went up and checked the rafters and they were installed all over the place. 16" OC, 15", 14", 14.5", etc. A nightmare. I figured if I can staple two of them together I can slide it down the sloped part of the attic. I might need to use a piece of foam blocking or something to create a spacer so it stays close to the roof and not the sheetrock. The parts above the attic I can staple in place.

2019-07-13 17.42.37.jpg
 

Stuff

Well-Known Member
Messages
1,221
Reaction score
130
Points
63
Location
Pennsylvania
You do need to pick a method and stick to it. The spaces should be either part of the thermal envelope or not. You either try to circulate air or you try to keep it from moving and use it as insulate/air gap. Traditionally keeping the underside of the roof from heating in the winter was to prevent ice dams.
 

Lordoftheflies

Active Member
Messages
368
Reaction score
32
Points
28
Location
NY
You do need to pick a method and stick to it.

Easier said than done! :D

The spaces should be either part of the thermal envelope or not. You either try to circulate air or you try to keep it from moving and use it as insulate/air gap. Traditionally keeping the underside of the roof from heating in the winter was to prevent ice dams.

I definitely had ice dams/icicles every winter. Like I said previously (I know I babbled a bit) I can see the snow on my roof melt way faster than everyone else.

Steps I plan on taking:

1. Vacuum all debris, installed stainless mesh on gable vents.
1a. Seal all gaps from the conditioned space (spray foam, IC recessed housing and/or rockwool "hats")
2. Since I have no soffits and therefore no soffit vents and no ridge vents......bring knee wall attic space into conditioned space by using foil faced foam board on rafters with foil side pointing towards the shingles. It's not perfect (i.e. not r-60) but it will at least stop the air flow when I seal all joints with spray foam. There is existing baffles installed in between the rafters and R-19 fiberglass batts. I will consider cutting up part of the floorboard right near the kneewall to get to the joists and install foam board blocking and spray foam to seal.
3. Install blown-in cellulose on sloped portions. I was even thinking of trying to dense pack the slopes (gently).
4. Install R-60 blown-in cellulose on the rest of the attic. I'll put some bright yellow duct tape on the rafters so I know how high I should go.
5. Frame out a hatch and insulate the hatch door (will need more research on that part).
6. Pop open a few beers.
 

Dana

In the trades
Messages
7,889
Reaction score
509
Points
113
Location
01609
There is a lot of stuff to cover here...

You absolutely need baffles top establish the 1" air gap (where possible) as a capillary break, even if there isn't a clear venting path.

Don't believe Bill Hulstrunk on the relative safety of dense packing. Dense packing it tight to the roof deck is really the last-resort, when all other options fail, and it does come with some risk, apparently a risk you're willing to take.

That risk is somewhat lower if you can hit 3.5-4lbs per cubic foot density, but that takes a well practiced pro with 2 stage blower. You're not likely to break (and probably won't even hit, but at least try) 3lbs density every where with a single stage rental blower. (In the hands of an amateur the odds of blowing out the finish would be high with a 2-stage blower. )

To sorta-dense pack with a rental blower, make a fairly stout air barrier on one end of the sloped ceiling, and (heavily) staple a corrugated air barrier where it enters the attic space you'll be working from. The hose is about 2.5" in diameter, so cut an X in the cardboard sufficiently wide to be able to stuff the hose through the cardboard and slip it all the way to the far end of the rafter bay. Use a cut-off sleeve from an old sweatshirt slipped around the hose as a gasket to limit the amount of blow-by hitting your face, and put a piece of tape around the hose about a foot from the end so you know when you're almost done, to avoid taking a full cellulose shower. If there are econobatts balled up in the rafter bay that you can't yard out (or at least make them flat) you may need to run it air-only to be able to insert the hose all the way to the end. It's fine to leave econobatts in place and dense pack over them, as long as they aren't forming an obstruction.

When you're pretty sure the hose is fully inserted, pull it back about 6-8" before starting to blow. Keep it steady in place, and blow until you hear the blower starting to stall and wind out, then pull it back 8-12", and twist it a half turn in either direction to get the flow going again. Blow until it stalls, repeat until you're all the way up to your top side air dam. If you fold the X-flap back and poke at the cellulose it should feel like a firm mattress, not a squishy pillow. With a single stage blower that should yield better than 2.5lbs density maybe 3 in the denser spots.

You'll definitely want a better type respirator mask and goggles when dense packing in tight quarters, not a cheap disposable dust masks. There is no way to avoid some blow-back, and your face will be right in it.

For the 3/4" foam board on the interior, installing the shiny facer toward the interior adds about R1 to the assembly. If the facer isn't adjacent to an air gap it's just another vapor barrier. When the facer is in contact with fiber insulation or other materials there is no radiated heat for it to reflect, and aluminum is highly thermally conductive. Some (but not all) polyiso that has a shiny reflective facer on one side and a white facer on the other has a higher fire-rating on the white facer than on the shiny stuff, which is why it's normally installed with the white side facing the conditioned space. In your case, if it's facing an attic space that's never used for storage or ducts it's fine to flip it. No matter what, the seams should be taped with a high quality aluminum HVAC tape (eg Nashua 324A, sold at most box stores.)

For tips on cutting up sheets of foam board cleanly see this video.

Stacking sheets of rigid polyiso glued together with foam board construction adhesive on the hatch works. It takes about 10" to hit R6o- a single sheet of 3" x 4' x 8' might get you there. Figure out how some method to weatherstrip it too. Even though the venting keeps air-transported moisture from accumulating up there, it's still an air leak at the very top of the "stack effect" stack.

What flavor beer?
 

Lordoftheflies

Active Member
Messages
368
Reaction score
32
Points
28
Location
NY
Thanks for all your input Dana. Really appreciated.

Ok I will provide an air gap where the roof deck meets the attic ceiling as well as on the sloped portions. I think I can double up the vent pieces and I understand that even though I don't have soffit vents to provide any airflow, at least the insulation won't be touching up right against the roof deck.

There's a downloadable guide in the bottom right corner of this page.

https://www.buildingscience.com/documents/guides-and-manuals/gm-attic-air-sealing-guide/view

I will install the PIC foam board with the shiny side facing away from the roof deck as you suggested. Makes sense. I think my brain was confused by the intense radiant heat currently up in the attic since it's summer. :D

I'm thinking spray foam might be better than tape for sealing the seams, no? Not concerned with the look but thinking that spray foam will do a better job at the super tight areas (i.e. where the rafters meet the floorboards and the kneewall).

I'm not too picky on beer. I eat way more than I drink. A Corona with lime sounds pretty tasty though. :D

The other problem I have is I don't have access to two parts of the knee wall where they installed these horrible built in cabinets. Maybe I will take this opportunity to rip those out, install the PIC foam boards, and seal the joists with foam blocking.
 

Dana

In the trades
Messages
7,889
Reaction score
509
Points
113
Location
01609
Spray foam does a lousy job of adhering to rigid foam board, an even lousier job with polyiso compared to EPS (despite being chemically far more similar to polyiso). Temperature rated foil HVAC tapes stick to foil facers EXTREMELY well, over very long periods and under a wide range of moisture & temperature.

Polyurethane caulk (or foam board construction adhesive) does the best job of air sealing the transitions from foam-board to framing, but you may still need to use can-foam for gaps bigger than a half-inch.

I can almost smell and taste the Corona & lime just thinkin' about it- good choice for summertime heat!
 

Lordoftheflies

Active Member
Messages
368
Reaction score
32
Points
28
Location
NY
Spray foam does a lousy job of adhering to rigid foam board, an even lousier job with polyiso compared to EPS (despite being chemically far more similar to polyiso). Temperature rated foil HVAC tapes stick to foil facers EXTREMELY well, over very long periods and under a wide range of moisture & temperature.

Polyurethane caulk (or foam board construction adhesive) does the best job of air sealing the transitions from foam-board to framing, but you may still need to use can-foam for gaps bigger than a half-inch.

I can almost smell and taste the Corona & lime just thinkin' about it- good choice for summertime heat!

I picked up some Nashua extreme weather tape (2 rolls).

https://www.homedepot.com/p/Nashua-...reme-Weather-HVAC-Foil-Tape-1207801/100507541

I will have to use spray foam on the bigger gaps and harder to reach areas where I won't be able to get the tape in there cleanly. My main concern is that the adhesive on the tape will inevitably fail some day.

My other question is if I'm sealing the rafters with the foam boards in the knee wall attic space, and then going up into the ceiling to put insulation on top of the ceiling, isn't that kind of doing both methods? I.e. method one is to keep the attic space as outside space and seal the kneewalls whereas method 2 is to bring the attic spaces into the conditioned space by sealing the rafters. I kind of feel that maybe I should just remove the insulation on the rafters and instead just seal the kneewalls (outlets, wires, etc.). Either way I'm going to have to rip up the floor boards in the knee wall attic space since I need to stop the outside air from slipping in between the joists of the ceiling of the first floor.
 
Top
Hey, wait a minute.

This is awkward, but...

It looks like you're using an ad blocker. We get it, but (1) terrylove.com can't live without ads, and (2) ad blockers can cause issues with videos and comments. If you'd like to support the site, please allow ads.

If any particular ad is your REASON for blocking ads, please let us know. We might be able to do something about it. Thanks.
I've Disabled AdBlock    No Thanks