Yes, you could, but it would interfere with the joist more, not sure it would fit in your existing notch. Also, it would require more height in the joist bay, not sure you have that much height.
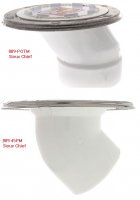
If I were installing a 45 flange in a tiled floor, I would figure out my finish floor elevation, add 1/8" for the top of the flange, and use a ring of plywood blocking under the flange itself, screwed to the subfloor (but not into the pipe, as Tuttle notes!), to set the 45 flange at the correct height at the time of glue up. [That could mean cutting the plywood blocking ring into two pieces to install just after gluing, depending.] Then I'd just tile up to the flange, rather than under the flange.
In other words, while the flange height should be just above the finish floor, the finish floor doesn't have to actually run under the flange. Maybe there are some upsides to running the finish floor under the flange that I'm overlooking, however.
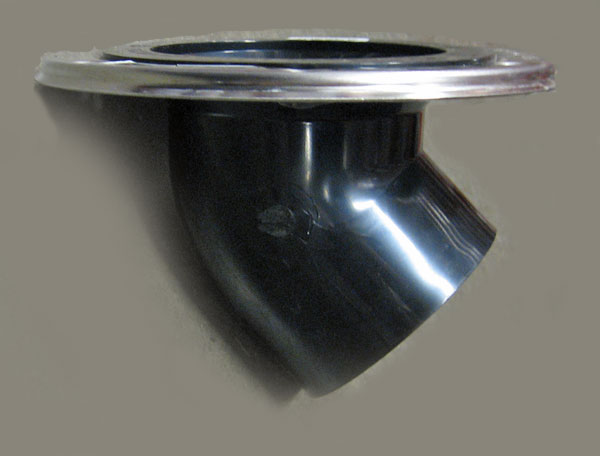
- I bought a straight flange and a couple of 45’s, totally won’t work as you predicted.
- thats a good plan for installing the flange with the 45, i still don’t think i can personally do that and it be successful but still need to think on it.
- clearly the offset would be the easiest one to install and as reach4 mentioned appears that it would require less notching
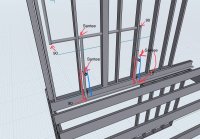
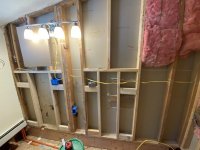
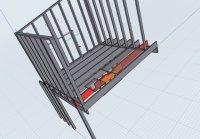
however i have a major joist issues, the first 2 pictures show the butchered joist and half a#&$@!s mini scab which is also butchered.
This is right under the to be new shower, additionally the toilet rough in 13” from the stud which is pretty much center of the joist.
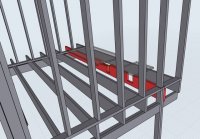
Third picture is the proposed fix showing the small scab removed and green sister added, i would make it as long as possible but probably not much more than shown. Would use PL premium and GRK RSS structural screws. Not sure if that is enough to fix it
I think that was Terry and/or Tuttle, not me.
Cheers, Wayne