Tub shoe washer/gasket

Users who are viewing this thread

JMattero

New Member
Messages
8
Reaction score
0
Points
0
Location
Philadelphia, PA
Hello:
I am NOT a plumber, but a DIY rehabber of rental properties I own.

Anyway, I need some help. In one of my properties, a tenant called to say that she had a leak whenever she took a bath, but NOT when she took a shower. I went to look, and when I ran water against the overflow, I got a small leak behing the tub (accessed thru the "trouble door" in the linen closet at the head of the tub) This is a 50 year old house with the original bathroom, but it is in surprisingly great shape!. Anyway, I took the overflow apart, and, FROM THE TROUBLE DOOR SIDE, I removed the old dry rotted overflow gasket/washer. I went to the local plumbing supply house, and showed him what I needed. He gave me two different types, but insisted that these go on the FINISHED side of the tub, NOT BEHIND the tub. I disregarded his advice (which I hate to do, since he knows far more about plumbing than I do!!!) and installed it via the trouble door. I tightened everything up , and again ran water against the overflow, and the leak appears to have been fixed. Can someone tell me which is the correct way to do this, and direct me to an exploded view somewhere, so I can put it in my files?

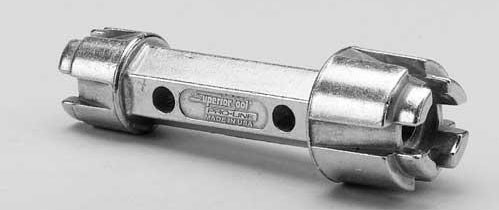
One more thing... When I was inspecting for the first leak, I noticed that the gasket under the tub strainer was also leaking slightly (maybe 10 drops per minute). I tried to tighten this by using channel locks in the strainer, and a screwdriver to turn the channel locks, but I couldn't get it to move. Since I didn't want to break anything, I decided to let it go until I could find the correct way to repair/replace this problem. Do I have to remove strainer, overflow, and all associated parts back to the main drain, or is there a way to simply replace the strainer washer/gasket? If it were your home, how would you proceed? Since I am NOT a great plumber, I would like to fix this once and for all, so I won't have to worry about it for the next 20 years or so. ANy advice?

Thanks in advance.
 

Jimbo

Plumber
Messages
8,918
Reaction score
18
Points
0
Location
San Diego, CA
I never heard of a gasket on the finished side of a tub overflow. Afterall, the purpose of that fitting is to oveflow! You put the gasket in the right place. It should have been a tapered thickness, to account for the slope of the back of the tub.


The shoe gasket can be replace by unscrewing the flange. The old gasket can be removed and a new one installed throught the hole, from the top. They make some tools to unscrew this flange if you need them. Available on the net or from a good plumbing supply.
 

hj

Master Plumber
Messages
33,603
Reaction score
1,042
Points
113
Location
Cave Creek, Arizona
Website
www.terrylove.com
gasket

That is probably the reason he is selling plumbing parts instead of installing them. You put it in the correct location. The strainer may unscrew with the right tools, but if not it can be cut out and a new one installed after replacing the gasket. Usually the plumber's putty between the strainer and the tub does more of the sealing than the gasket.

pp19010.gif
 
Last edited by a moderator:

JMattero

New Member
Messages
8
Reaction score
0
Points
0
Location
Philadelphia, PA
A little clarification

Jimbo and HJ:
Thank you both for your help. You have eased my mind, regarding the overflow gasket. However, the guy sold me two different types. One was the beveled type, and the other was a softer type of rubber that was thicker (maybe 1/2 " thick) around the outer perimiter, and maybe 1/4" think on the inner area. I installed it on the overflow pipe so that the thicker outer area surrounded the outside perimiter of the overflow pipe's elbow, and the thinner area is actually providing the seal between the back of the tub and the face of the overflow elbow. (This is much easier to do than it is to describe!!!).

If I had used the beveled washer, am I correct in assuming that the thicker part of the bevel would be at the bottom, and the thinner part at the top?

Also, if I understand both of you correctly, you are saying that I can use a dumbell wrench (like the one pictured in the exploded view), and unscrew the strainer from the inside of the tub. At that point, I can replace the gasket by passing it through the drain hole, and then screw the strainer back into the fitting, and all of this can be done from above. Is it called a "dumbell" wrench because guys like me don't know how to do this???

Again, thanks for your help with this!

dumbell_wrench.jpg
 
Last edited by a moderator:

calantha

New Member
Messages
25
Reaction score
0
Points
1
Location
New York
Hi -- I've been lurking for a little while, but this is my first post. I'm replying to this thread, because I don't know how to refer to this one if I start a new one. Hope that's OK...

I'm in the middle of replacing the face-plate/trip lever on my tub, and I've run into a curveball. The diagram on the package shows a "beveled overflow washer" between the faceplate and the overflow tube.

Looks like something I can easily buy tomorrow a.m. at my local hardware store (yeah, I'm lucky enough to still have one of those!). But I'm not entirely clear how to proceed. I've gotten a partial answer from this thread, but I'm still a bit confused.

Here's where I am: I removed the old face-plate, and pulled out the linkage and barrel assembly. I disconnected the linkage from the trip lever, cleared out the barrel (yuck!) and cleaned up the outside with some steel wool.

Now, when I look at the opening in the tub, I see something that might once have been a gasket. But I don't see anything that looks like part #2 in the diagram. Do I need one of those? (And does it have a name?) Also, I guess I should scrape out the remains of the old gasket, yes? Any tips on how to do that?

So far, I'm working from the tub side, but I do have an access panel to get to the back. Should I be approaching this from there? It's behind a bookcase, so it's not exactly convenient, but it's doable.

Thanks in advance --
 

JMattero

New Member
Messages
8
Reaction score
0
Points
0
Location
Philadelphia, PA
Calantha:
The "Beveled Washer" would NOT go on the tub side. You would have to go into the access panel from the back of the tub, and the overflow tube will be loose (since you removed the faceplate fromt he tubside). The bevelled washer will go between the elbow of the overflow tube (not labelled on the diagram, but the part BEHIND part#1) and the back of the tub. You will have to pull a little on the elbow to make room for the bevelled washer. The part #2 you are asking about is on some tubs, but not all. If yours is not there, don't worry about it. The part you think "might have been a gasket at one time is probably built up dirt (sorry!!!).

Basically, from behind the tub, you insert the bevelled washer, fat side down, to take up the space between the back of the tub (which is slanted) and the elbow of the overflow tube (which is flat). The bevelled washer can be found at Home Depot, or at any Plumbing Supply house. It is a ring of rubber where the bottom of th ering is thicker than the top of the ring.

Hope tha thelps, but, if not, post again.

Jeff
 

calantha

New Member
Messages
25
Reaction score
0
Points
1
Location
New York
Jeff -
Thank you for your explanation. That really helped!

I looked again and I do see the gasket, and that makes sense how it fits against the shape of the tub. No offense taken about the built-up dirt -- there's some of that as well, and at my house it's never a bad guess :)

I slept on it, and I've decided to leave the gasket alone, and just reinstall the faceplate/linkage/barrel. I don't want to go too far down the "while we're at it" path. This little project really started because I'm tired of looking at the corroded old lever for the drain, and I suddenly realized on a walk through HD that I can simply get a new one.

Then the first "while we're at it" was that this tub drain has never closed properly to keep the water in. I rarely use it for baths (mostly showers) but when I do I need to use one of those rubber disk thingies over the drain to seal it. So I thought I could try to improve that situation -- nothing to loose.

So I figure I'll just leave the gasket alone for now. If there are any problems later, I'll know to look at it.

One more question about the barrel part. I cleaned it up so the outside surface is smooth, but is there anything else I should do to improve the way it closes to hold water in the tub? Should I put some silicone grease on it?

Thanks again -
 

JMattero

New Member
Messages
8
Reaction score
0
Points
0
Location
Philadelphia, PA
Bevelled gasket

Calantha:
There is no need to replace the bevelled washer unless you notice that when you take a shower, or get water on the overflow faceplate, that some water leaks out of the back of the tub. This would probably be most easily noticed by a stain on the ceiling below the head end of the tub.

As far as getting the stopper to work better, you can also by a new linkage which will include the threaded rod, and the barrel at the bottom. However, yours will probably work, if you can adjust it. It works by, when you lift the lever in the tub, it pushes the barrel further down the pipe, and blocks the outlet of the water. If you look at the diagram, the linkage travels up and down inside the "L" shaped part between parts 11 and 12. The barrel, when properly positioned, closes off the short leg of the "L", so water stays in the tub. Using grease on it certainly cannot hurt anything, since it will make it slide up and down easier. If it is currenly not holding water, move the barrel down the threaded rod. My guess is that is is not going down far enough, and therefore, not sealing off all of the water. As a test, you can move it far down the rod, and just put the linkage in the overflow, and let it fall to the bottom. THen, try to fill the tub with water, and see if it holds all of the water. You have to balance between making the barrel be as low as possible, but, at the same time, where it will not be too long, once you hook it up to the lever on the faceplate. The lower the better, as long as it will work with the faceplate attached. If it is too long, the lever will not work properly (you won't be able to pull the lever up since the barrel will be bottoming out in the pipe, before the lever reaches the up position.

Hope that helps.

Jeff M
 

hj

Master Plumber
Messages
33,603
Reaction score
1,042
Points
113
Location
Cave Creek, Arizona
Website
www.terrylove.com
gasket

As far as the beveled washer is concerned. You rotate it until it matches the space. Sometimes the wide part is at the top, sometimes at the bottom, and other times towards one side or the other. It depends on the angle of the overflow fitting, and the slope of the tub.
 

calantha

New Member
Messages
25
Reaction score
0
Points
1
Location
New York
Well, I worked on this for quite a while over the weekend, and I just can't get it to close so water stays in the tub. I need to move on to other things. But I have my new face-plate, which is what I wanted in the first place. And I'm no worse off than I was with the drain.

I appreciate your help.
 

Redwood

Master Plumber
Messages
7,335
Reaction score
13
Points
0
Location
Connecticut
The water not staying in the tub would be either the barrel that you previously cleaned is improperly adjusted so it doesn't drop down far enough, or, badly worn or corroded so it doen't seal properly in the tee below. The tee may also be badly worn or corroded. I would make sure the wire linkage to the barrel is properly adjusted first.
 

calantha

New Member
Messages
25
Reaction score
0
Points
1
Location
New York
I suspect it might be the corroded tee. In the course of my "experiments" I tried a brand new linkage/barrel. I also tried eliminating the "not long enough" variable by removing the linkage from the face-plate, and then hooking the end of a wire coat-hanger through the holes for the cotter pin. That way I could manipulate it up and down by hand and have a better feel for how it was moving. If I let it all the way down, it did bind at the bottom but still didn't seal the tub. Also, after I moved it up and down a bunch of times and pulled it out, there was a small "gunk ring" maybe 3/4" up from the bottom of the barrel. That might indicate that it's only getting partway through the space it needs to be in to fully block the water out-flow.

Thanks for your suggestions -
 

Redwood

Master Plumber
Messages
7,335
Reaction score
13
Points
0
Location
Connecticut
Heck it may even be the wrong size barrel.
I had a job a while back where it had obviously been replaced and I couldn't get it to seal. The customer called her next door neighbor (it was a condo) and we went over and looked at hers. I recognized it as a kohler and we got the right one and installed it...
Good to go!
 

Danno

New Member
Messages
6
Reaction score
0
Points
0
I've installed a replacement overflow plate. However, when I put in a gasket, the gasket pushes the overflow pipe out far enough so that the basket no longer stops the water from going down the drain. (I've tried re-positioning the gasket, but it doesn't make any difference.) If I want to seal the connection between the plate and the pipe without a rubber gasket--because I think this is where I'm getting a leak--can I just caulk it (from the tub side)? If so, do I use a silicone caulk, or can I use a non-silicone caulk?
 

Danno

New Member
Messages
6
Reaction score
0
Points
0
Please see post #14. Is post #15 in response? If so, I don't understand. I'm just suggesting substituing caulk for the gasket.
 
Last edited:

Redwood

Master Plumber
Messages
7,335
Reaction score
13
Points
0
Location
Connecticut
Ah sorry...
your talking drain...

Order of assembly
drain spud
plumbers putty
tub
gasket
drainshoe
 

Danno

New Member
Messages
6
Reaction score
0
Points
0
In post #14, I'm talking about the overflow plate, lever, and tube. To put in the gasket, I disconnected the linkage and barrel from the overflow plate (by removing the cotter pin). I then put the gasket between the tub and the tube (from the access panel), reconnected the linkage and barrel to the plate, and screwed the plate into the tube. But the gasket pushes the tube away from the tub--enough so that the barrel doesn't block the flow of water when I want it to. So am I doing something wrong in putting in the gasket? If not, once I remove the gasket, is my recourse to substitute caulk or putty?
 

Danno

New Member
Messages
6
Reaction score
0
Points
0
Please see reply #18. I continue to have the problem that the gasket pulls the drain pipe too far away from the overflow plate. I've been using a bevilled gasket that's 3-3/16 x 2-1/8. Would a different size or type of gasket have a different thickness? Can I just use caulk (e.g., a non-silicone like Polyseamseal Tile & Tub Adhesive Caulk)? Thanks.
 
Top
Hey, wait a minute.

This is awkward, but...

It looks like you're using an ad blocker. We get it, but (1) terrylove.com can't live without ads, and (2) ad blockers can cause issues with videos and comments. If you'd like to support the site, please allow ads.

If any particular ad is your REASON for blocking ads, please let us know. We might be able to do something about it. Thanks.
I've Disabled AdBlock    No Thanks