Tub drain trim doesn't match shower-- easy fix?

Users who are viewing this thread

PepeLePue

Member
Messages
48
Reaction score
6
Points
8
Location
Chicago
My plumber ignored my requests to use brushed nickel trim on the tub. I now understand why he did it, because Gerber lift n turn brass drain isn't readily available in brushed nickel for some reason, but wish he would have told me so I could have sourced it. Anyways, I found the correct trim kit and want to install it. I've never done a bath drain and we've already finished drywall basically done with the renovations (including the room below the bathtub). I know he used plumbers putty and pretty sure he used dope on the threads. Its been a while (>6 months) since he did the rough in, but assuming it should still be relatively easy to pull off. Is there a chance the drain drops when I unscrew the trim and I lose it in the ceiling/floor? Or am I overthinking this?

The drain, for your reference:
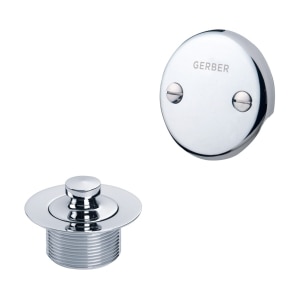
Thank you!
 
Last edited:

Tuttles Revenge

In the Trades
Messages
4,205
Reaction score
1,459
Points
113
Most likely shouldn't drop or move... but that can happen. I would start with the drain first, leaving the overflow in place to hold the assembly. Then once you've replaced the drain, replace the overflow.

We always install a chrome trim with the tub at rough in.. it then gets changed out later for the final finish so that the final piece survives drywall and tile installation intact.
 

Tuttles Revenge

In the Trades
Messages
4,205
Reaction score
1,459
Points
113
I'd say from experience of having messed up, the most important thing is to not Cross thread the drain. It must thread in properly and easily. If you feel too much tension on it, pull it out and start over.
 

PepeLePue

Member
Messages
48
Reaction score
6
Points
8
Location
Chicago
Yea I do somewhat appreciate not having had the final installed but just overall experience with him has been bad so not giving him the benefit of the doubt that was his intent haha.

I will give it a whirl! Thank you guys for the tips
 

PepeLePue

Member
Messages
48
Reaction score
6
Points
8
Location
Chicago
I'd say from experience of having messed up, the most important thing is to not Cross thread the drain. It must thread in properly and easily. If you feel too much tension on it, pull it out and start over.
Even if it drops a little one can usually finagle things into place and screw the drain up tight.

Have either of you guys (or anyone else looking at this) ever used these trim kits? Look like they snap on over the existing hardware. Seems like a good solution in my shoes so I don't have to risk cross-threading the drain.


Tuttles Revenge

In the Trades
Messages
4,205
Reaction score
1,459
Points
113
I don't think thats exactly what it does. Those trims are designed to go over their specific waste and overflow, but the bottom shoe drain piece does glue on / in the drain thats already there. The problem is that it raises the height that water needs to get down the hole... The video explains that the drain piece is Thin, which makes that less of a problem.

The overflow cover won't just snap over your existing if its as shown in your original photo. However I believe this kit is sold with a single hole in the center of the cover version, which can be attached with a 2 hole to 1 hole cross bar.

I have installed this kit for the reasons we explained and they re-iterate in the video, to avoid damage during construction. However, I don't have end user knowledge of how its held up.
 

PepeLePue

Member
Messages
48
Reaction score
6
Points
8
Location
Chicago
I don't think thats exactly what it does. Those trims are designed to go over their specific waste and overflow, but the bottom shoe drain piece does glue on / in the drain thats already there. The problem is that it raises the height that water needs to get down the hole... The video explains that the drain piece is Thin, which makes that less of a problem.

The overflow cover won't just snap over your existing if its as shown in your original photo. However I believe this kit is sold with a single hole in the center of the cover version, which can be attached with a 2 hole to 1 hole cross bar.

I have installed this kit for the reasons we explained and they re-iterate in the video, to avoid damage during construction. However, I don't have end user knowledge of how its held up.
Not saying this in a snoby way I'm clearly not a plumber but I have changed overflow plate its pretty simple. Is the drain component relatively easy as well? Any tips?

Looks like Oatey sells a True Blue Trim Kit but I can't find it in any stores. Not sure if you think one is better than the other or if the Watco one is "good enough"

Thank you!
 
Top
Hey, wait a minute.

This is awkward, but...

It looks like you're using an ad blocker. We get it, but (1) terrylove.com can't live without ads, and (2) ad blockers can cause issues with videos and comments. If you'd like to support the site, please allow ads.

If any particular ad is your REASON for blocking ads, please let us know. We might be able to do something about it. Thanks.
I've Disabled AdBlock    No Thanks