New water softener system awaiting installation, few questions.

Users who are viewing this thread

Marcelo73

New Member
Messages
24
Reaction score
0
Points
0
Location
Los Angeles
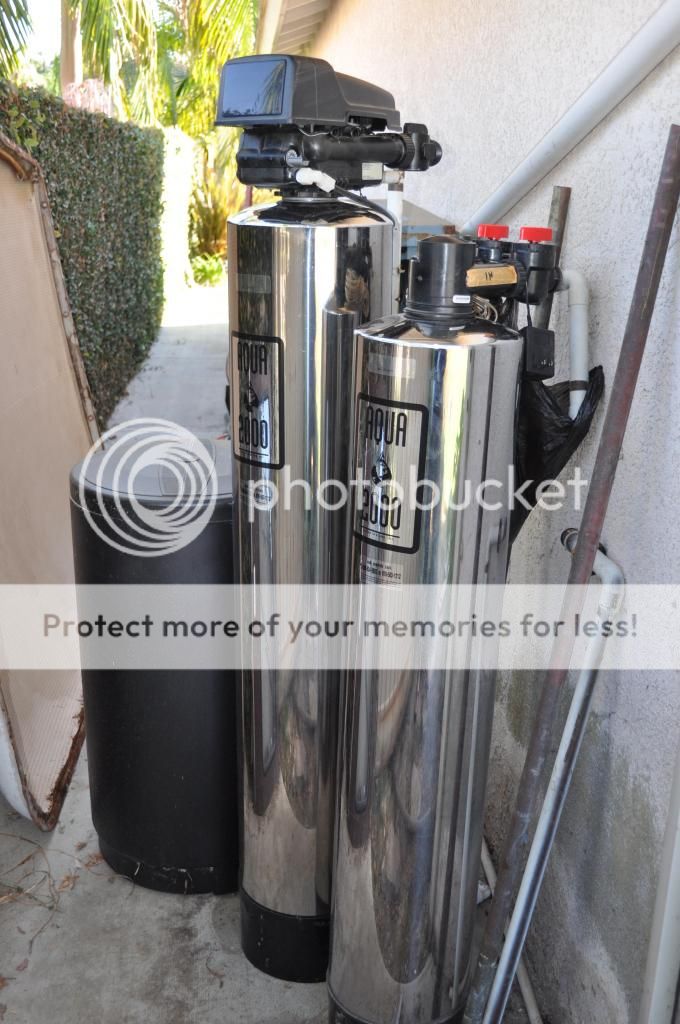
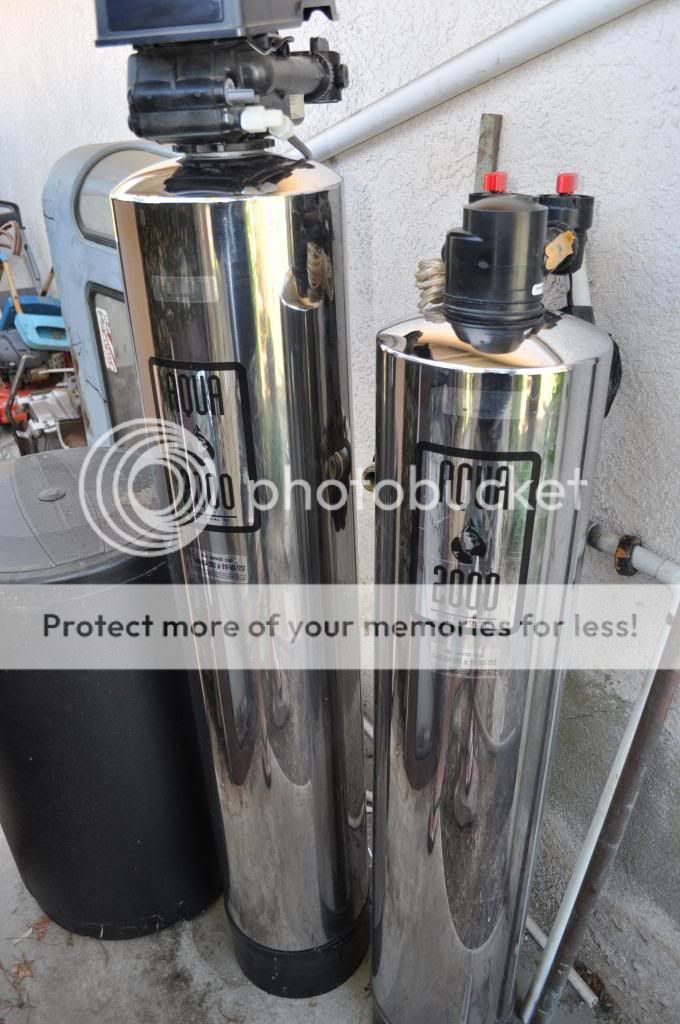
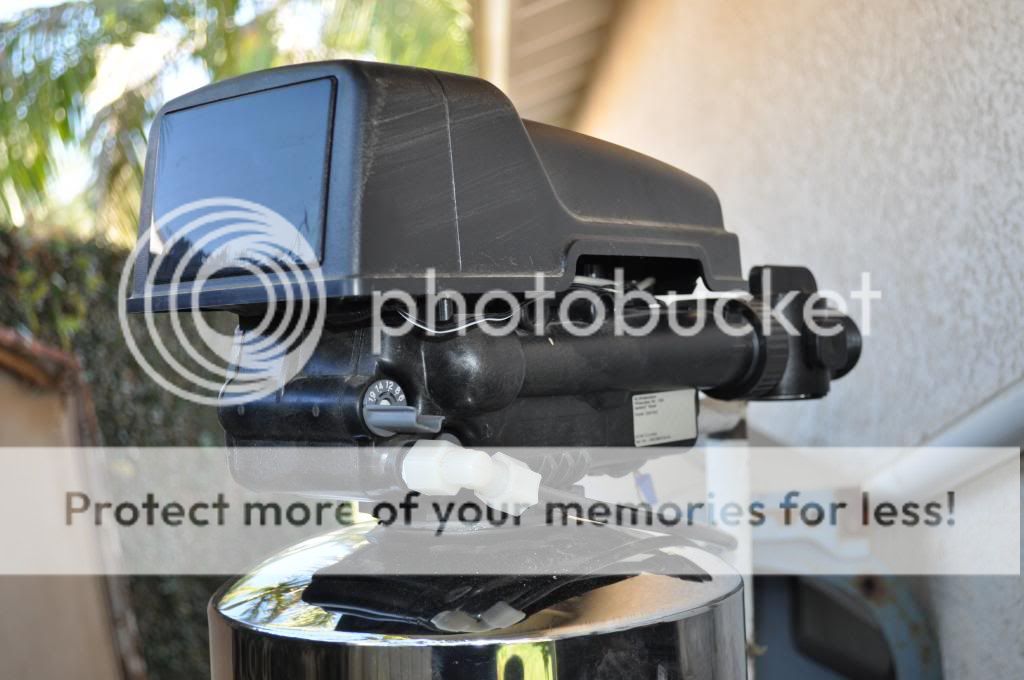
First off Hello to all from Los Angeles CA. I have been browsing the threads and found a ton of useful information for my newly acquired water softener system install. A buddy of mine lost his home but prior to that offered up his 3 year old water softener system. I went ahead and took photos of it installed hacked away at pipes and re-sweated.

Now comes the fun part , the install. Ive got almost all the parts needed to get the install completed, I project about 5-6 hours by myself with no help or major hicups, but who knows with little ones it may very well be a week long project. I know how these devices work but am no expert by any means and contacted a local water softener company to get a quote on a service as my buddy said it was up for service. The representative came out and did his spiel to try and sell me a new system which I politely thanked and refused. He quoted his company could do the service and start up of this system for $380.00. This seems a bit high for what is done, or is this a reasonable price?
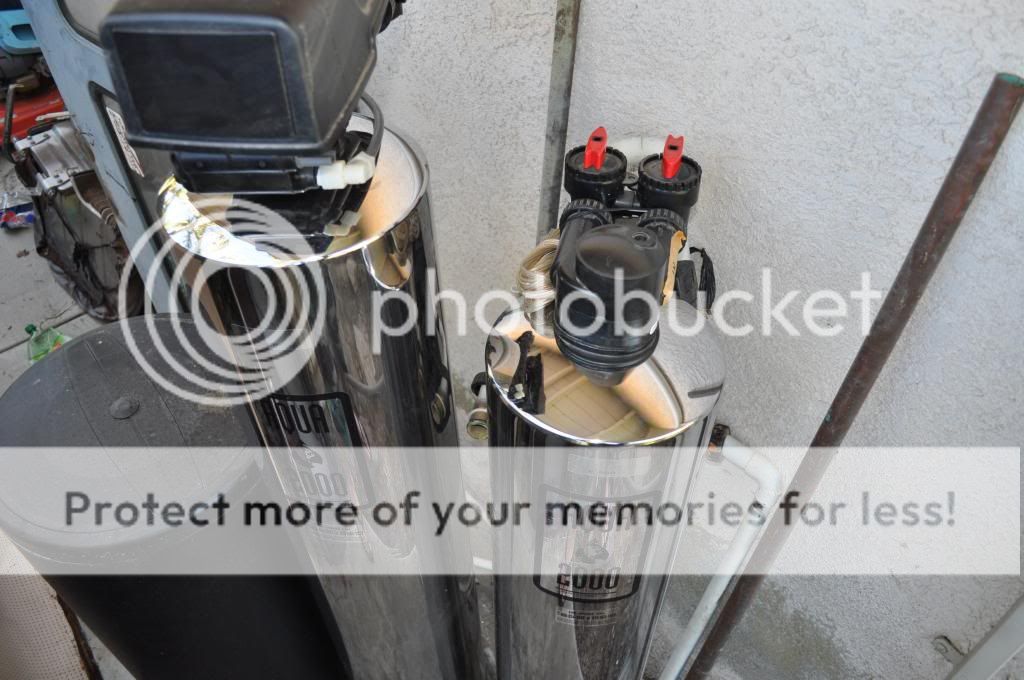
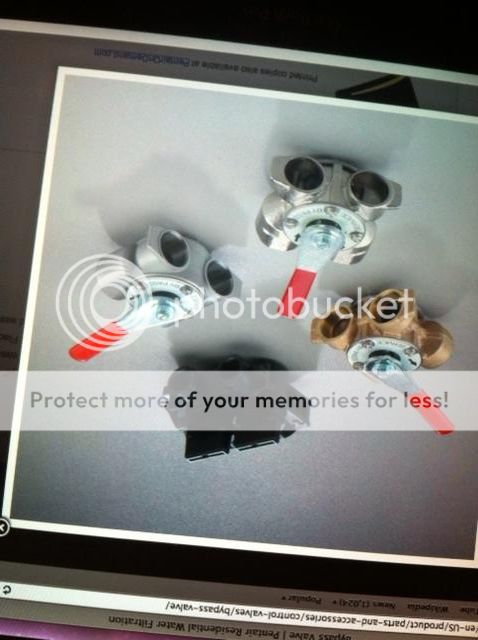
[/B]The only question I have on the install is the use of bypass valves. I see there are valves on the inlet tank but would these suffice? I've read about the stagnant water which can build up when using certain types of configurations with the ball valves, such as when they are used in an H configuration? Ive seen some by-pass valves which if I can locate locally I will utilize.
[/B]

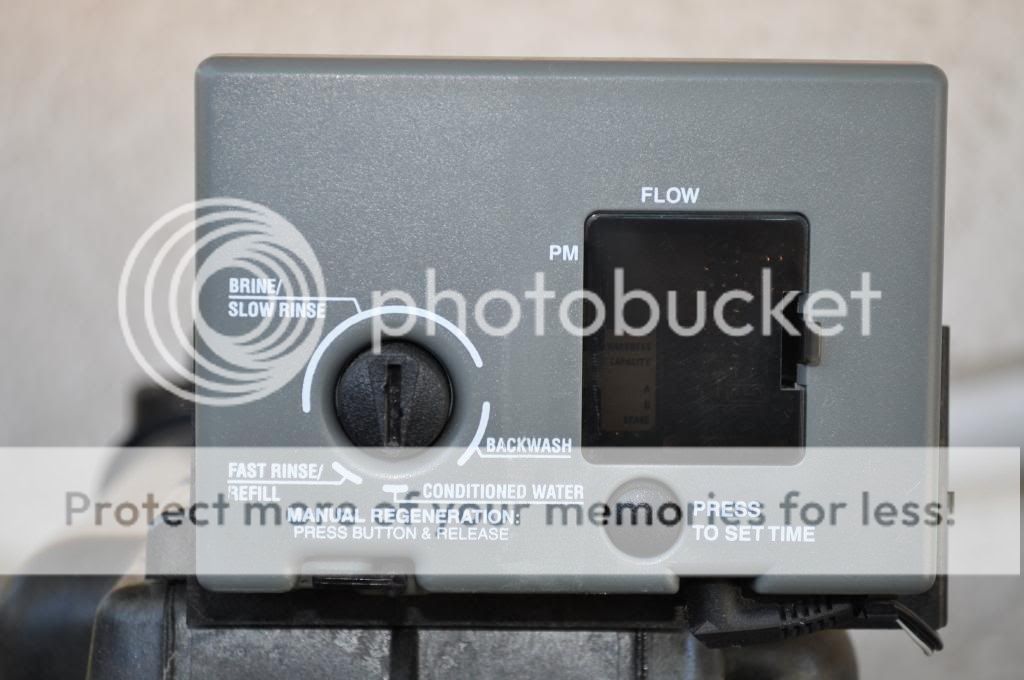
I have posted photos of my bling bling system and brine tank, along with the by-pass valve I would like to use. It will be placed outdoor under a 3' 1/2'' overhang which should protect it rather well against the elements and the 12" of rain we get a winter here.

Im having trouble uploading photos, I will try something else on a follow-up post to this thread.

Thank you all, any suggestions or ideas are always appreciated to make this install and restart as smooth as possible.
 
Last edited:

Marcelo73

New Member
Messages
24
Reaction score
0
Points
0
Location
Los Angeles
DSC_0594.jpg

DSC_0601.jpg
DSC_0600.jpg
DSC_0596.jpg
 

Gary Slusser

That's all folks!
Messages
6,921
Reaction score
22
Points
38
Location
Wherever I park the motorhome.
Website
www.qualitywaterassociates.com
You have an Autotrol valve and need their by pass valve for the model valve you have.

The other piece, a filter, has a Clack in/out head on it with its own by pass valve. And yes, use the make/model specific by passes rather than building a 3 way manual type.

The picture of by pass valves is of Fleck by passes and you can't use any of them.

Sorry, I now see the Autotrol valve has a by pass valve on it....
 
Last edited:

ditttohead

Water systems designer, R&D
Messages
6,088
Reaction score
455
Points
83
Location
Ontario California
The bypasses you posted are not compatible with the system you have. Those are Fleck bypasses, you have an Autotrol valve, and a Clack In/Out head. Both units already have bypasses installed, so you could simply install the units after getting the proper plumbing connectors specific to thoe valves. What type of plumbing do you have? The plumbing connectors are relatively common.
 

Marcelo73

New Member
Messages
24
Reaction score
0
Points
0
Location
Los Angeles
The bypasses you posted are not compatible with the system you have. Those are Fleck bypasses, you have an Autotrol valve, and a Clack In/Out head. Both units already have bypasses installed, so you could simply install the units after getting the proper plumbing connectors specific to thoe valves. What type of plumbing do you have? The plumbing connectors are relatively common.

Type of plumbling? Do you mean pvc or copper? Im using copper, excuse me as to not understanding your questions i'm not a plumber by trade.

As suggested I will cut out the by-pass I intended on using and start putting this thing into place, and fire her up. OOPPssss, what do you suggest on the service, should I let this company do the start up/service and then for the years to come as I learn it, complete it myself or is the start up/service simple?
 

ditttohead

Water systems designer, R&D
Messages
6,088
Reaction score
455
Points
83
Location
Ontario California
In the pictures, both units have the bypasses already. Each unit should have a bypass, and they do.

Yes to the type of plumbing. Both units have plumbing connectors available in copper sweat type. Be sure to consider code as to the electrical ground. Both of these bypasses will break the plumbing ground. http://www.pure-aqua.com/product_fi...263-268-Performa Cv Owners Manual 1228354.pdf Here is a link to a manual for a similar system. It uses the same plumbing connector.

The Autotrol is part # 1001670 for 1" sweat kit.

The clack connector for 1" sweat is V3007-02LF,

Hope this is helpful.
 
Last edited:

Marcelo73

New Member
Messages
24
Reaction score
0
Points
0
Location
Los Angeles
Those pieces are still on the old plumbing if he/you didn't cut them out of the plumbing... If they were cut out, which would have to be done to put the plumbing back together to get water into the house, they should have come with the equipment. So ask the seller where they are.
I did the cutting and have everything that was there when installed, I will post a few more photos and see if anyone sees anything that I'm perhaps missing, they say vision is first to go...

Also does anyone have information on the service for these tanks. They have been stores indoors but out of service for almost a year in half or so. Like I noted in initial post local company wants $$$$ to service.

Thanks again gentlemen.

Marcelo
 

Marcelo73

New Member
Messages
24
Reaction score
0
Points
0
Location
Los Angeles
Wait I have both these fitting attached as they sit, so this is resolved and install can move forward.

Now if I understand correctly, the electrical plug is a simple plug in and that's it, the ground is already on attachment.


Cheers
Marcelo
 

Gary Slusser

That's all folks!
Messages
6,921
Reaction score
22
Points
38
Location
Wherever I park the motorhome.
Website
www.qualitywaterassociates.com
Glad to hear you have those fittings.

When you are ready to turn the water on, have the control valve in backwash and turn on the water about a 1/4 flow until it starts going out the drain line. Then open it up watching the water for color or resin. If color open it full open but shut it down some if you get resin. Run it until any color disappears then step the control through the cycles to Service and run water a tub to flush the lines.

You need to program the control valve based on your hardness etc. and how much water you use per day.

BTW, you solder those fittings on the plumbing without them connected to the by pass or control valve. Otherwise you melt plastic...

You need to add like 5 gallons of water to the brine tank before adding salt. And I suggest keeping the salt level about half full instead of filling the tank and then if there is a problem you have to remove salt to be able to work on it. It also helps prevent running out of salt if you check the level more frequently than not.
 
Last edited:

ditttohead

Water systems designer, R&D
Messages
6,088
Reaction score
455
Points
83
Location
Ontario California
lol, I still cant figure out the brine tank half full theory, and how that prevents you from running out of salt. Sometimes your logic is about as sound as screen doors on a submarine.

Fill the brine tank full of salt. Check it on occassionally. Keep it full. Every year or two, let it run low, empty, clean, refill with salt and 5 gallons of water. It is not a complex item.
 

Gary Slusser

That's all folks!
Messages
6,921
Reaction score
22
Points
38
Location
Wherever I park the motorhome.
Website
www.qualitywaterassociates.com
Half full requires checking the level more frequently and in a shorter period of time than filling the thing and checking it every few months, which makes forgetting to check it much more likely than checking it say weekly.

Checking more frequently also provides the opportunity to see the effects of a power outage caused incorrect time of day on those valves that do not maintain the time during a power outage. It also helps to see any water leaks or too much water in the salt tank meaning the unit is not regenerating correctly and/or has a serious problem that could cause salt water overflowing onto the floor.

And if the softener has a salt grid, cleaning the tank usually doesn't require more than wiping the inside 'dirt ring' off with a wet rag once in awhile. Many people cause themselves problems when they empty a salt tank and wash it out etc..
 

ditttohead

Water systems designer, R&D
Messages
6,088
Reaction score
455
Points
83
Location
Ontario California
So a salt grid eleimnates the dirt in salt? lol, you need to take a physics course. The brine grid only hides the dirt, it does not get rid of it. Your logic on this one is not sound. A softener will go for many years without service, and if a homeowner is incapable of doing a 1 minute visual check on their softener every couple of months without having to constantly add salt to keep it half full, then maybe they should be on exchange tanks instead.

You are the only one I have ever heard promoting keeping the brine tank less than full, except for guys who sell cheap square brine tanks, then you may have a point since the square brine tanks can start to look pregnant after a few years, especially in warmer climates.
 

Marcelo73

New Member
Messages
24
Reaction score
0
Points
0
Location
Los Angeles
Glad to hear you have those fittings.

When you are ready to turn the water on, have the control valve in backwash and turn on the water about a 1/4 flow until it starts going out the drain line. Then open it up watching the water for color or resin. If color open it full open but shut it down some if you get resin. Run it until any color disappears then step the control through the cycles to Service and run water a tub to flush the lines.

You need to program the control valve based on your hardness etc. and how much water you use per day.

BTW, you solder those fittings on the plumbing without them connected to the by pass or control valve. Otherwise you melt plastic...

You need to add like 5 gallons of water to the brine tank before adding salt. And I suggest keeping the salt level about half full instead of filling the tank and then if there is a problem you have to remove salt to be able to work on it. It also helps prevent running out of salt if you check the level more frequently than not.

Ok Gary.

I actually hacked the piping down below far from the inlet and outlet at the valve, so I won't have to worry about anything melting.

Is there a manual available to assist me in the programming of the control valve?

And finally how do I know if the tank requires resin, or should I replace it since the tanks have not been services in about 3 years and been out of use for over a year?

Thanks Gary, I appreciate the information.
 

Gary Slusser

That's all folks!
Messages
6,921
Reaction score
22
Points
38
Location
Wherever I park the motorhome.
Website
www.qualitywaterassociates.com
So a salt grid eleimnates the dirt in salt? lol, you need to take a physics course. The brine grid only hides the dirt, it does not get rid of it. Your logic on this one is not sound. A softener will go for many years without service, and if a homeowner is incapable of doing a 1 minute visual check on their softener every couple of months without having to constantly add salt to keep it half full, then maybe they should be on exchange tanks instead.

You are the only one I have ever heard promoting keeping the brine tank less than full, except for guys who sell cheap square brine tanks, then you may have a point since the square brine tanks can start to look pregnant after a few years, especially in warmer climates.
The grid allows the 'dirt' to stay on the bottom of the tank and cause no problems until there is a few inches of it, which should be in maybe 20+ years if not a decade or two longer than that.

Yes a softener can go many years without requiring any service so I question why you "professionals" suggest cleaning the salt tank, what was it you said, every two years? Or don't you consider that as service? So which way is it, every two years or not?
 

ditttohead

Water systems designer, R&D
Messages
6,088
Reaction score
455
Points
83
Location
Ontario California
I would like to hear anyone else who has the opinion that a couple inches of ??? in he salt tank for 20 years without cleaning is an accepatable practice. Are you really going to stick to that? Just like you stuck with telling someone to repair a plumbing problem with duct tape?
 

Gary Slusser

That's all folks!
Messages
6,921
Reaction score
22
Points
38
Location
Wherever I park the motorhome.
Website
www.qualitywaterassociates.com
I don't see where you can assume I said it was even suggested to go 20 years let alone accepatable practice. It must be something in your self treated water that causes you to misconstrue what I say so much. I'm starting to think you do it on purpose; like the trolls you go on about repeatedly.

The duct tape thing was about using it to hold salt bags over a well casing service line etc. excavation while back filling the hole but I see you like to gossip. See if you can find someone to tell you about how I extended buried etc. well casing up out of the ground to replace jet pumps with a submersible. And remind those pump and well driller etc. anti DIYer whiners that it was in PA where I was fully licensed. I'm sure you'll get along just fine with them.
 
Top
Hey, wait a minute.

This is awkward, but...

It looks like you're using an ad blocker. We get it, but (1) terrylove.com can't live without ads, and (2) ad blockers can cause issues with videos and comments. If you'd like to support the site, please allow ads.

If any particular ad is your REASON for blocking ads, please let us know. We might be able to do something about it. Thanks.
I've Disabled AdBlock    No Thanks